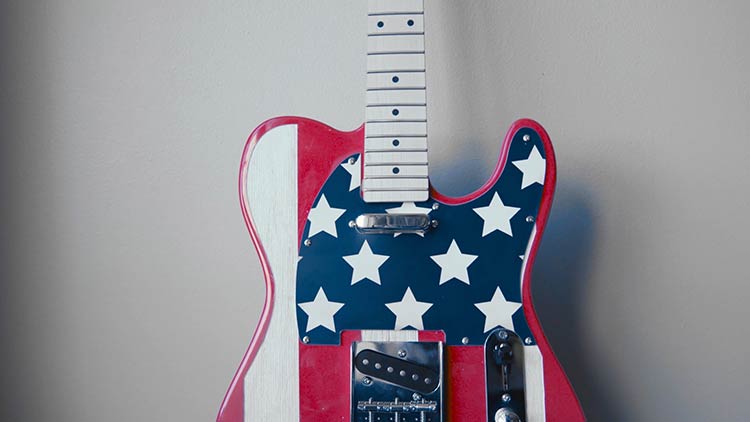
Laser Engraving a Stars and Stripes Fourth of July Custom Guitar
Metal, Plastic, Wood
Introduction
Project Settings
-
We used blue/white core plastic from Rowmark, purchased from Johnson Plastics Plus.
Place the Guitar
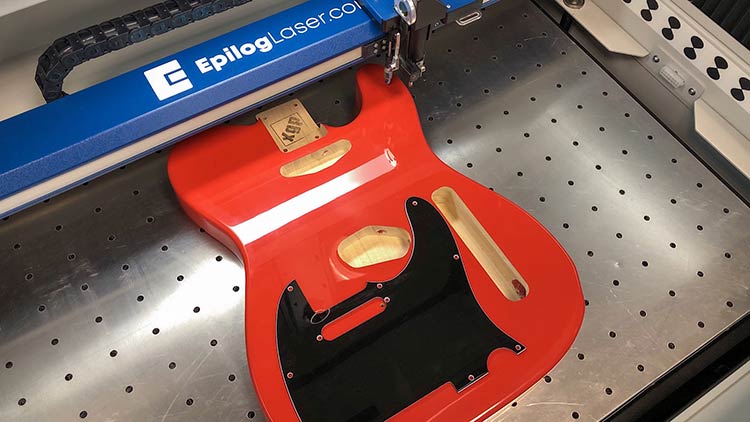
Start by placing your guitar body and pickguard into a Fusion Pro laser system, and close the top door. At the laser, use the Focus and Jog features to bring the guitar body and pickguard into focus.
Copy Background Image
With the Epilog Dashboard now open, you’ll see a top down view of the guitar body and pickguard on the bed of your laser system.
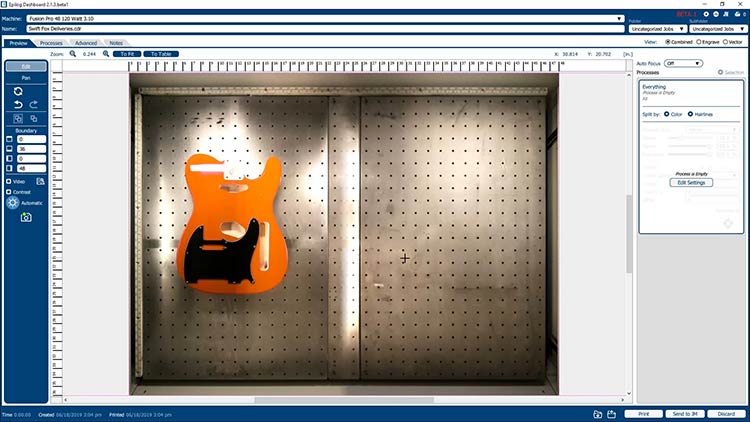
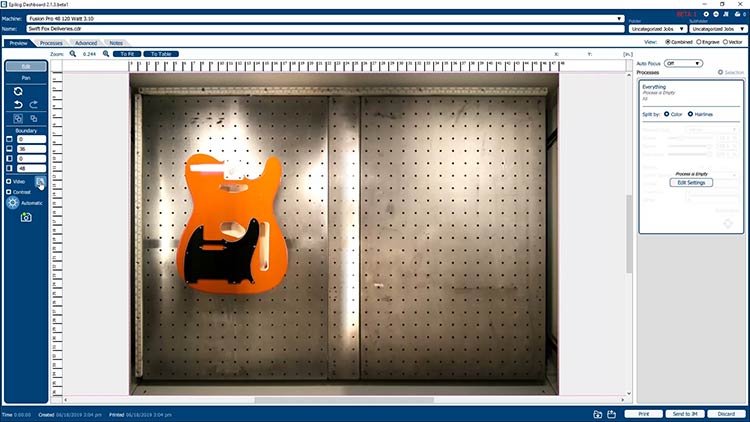
Click on the Copy Background Image button in the left tools panel.
Paste Background Image
Open your version of CorelDRAW, and paste the copied background image into the page.
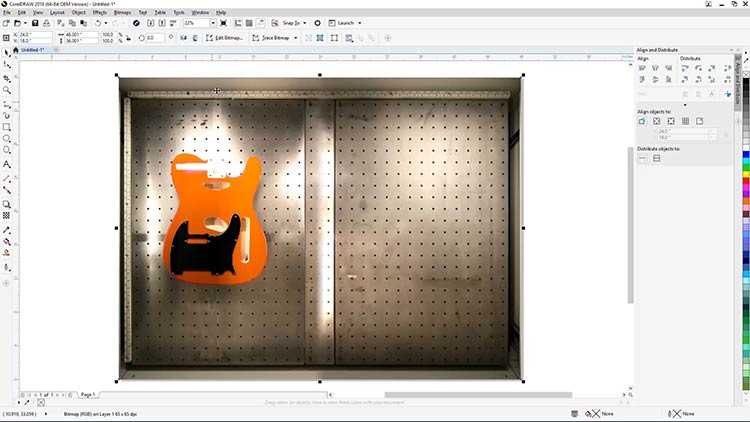
Crop Background Image
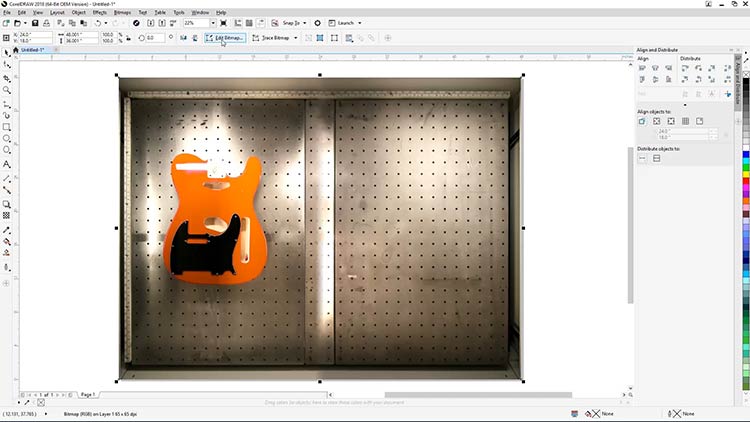
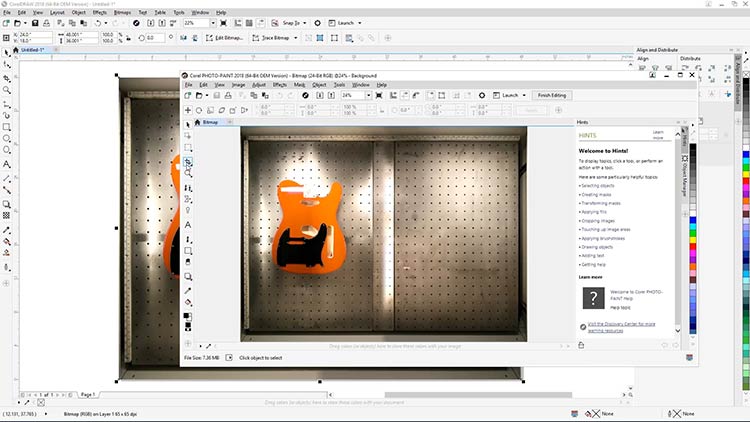
We’re going to crop the pasted image to make it easier to work with in CorelDRAW. With the image still selected, click on the Edit Bitmap button in the Properties Bar at the top of the screen to open a copy of the pasted image in Corel PHOTO-PAINT.
Within PHOTO-PAINT, select the crop tool in the toolbar on the left side of the screen.
Draw a rectangle around the guitar body and press Enter to create a cropped version.
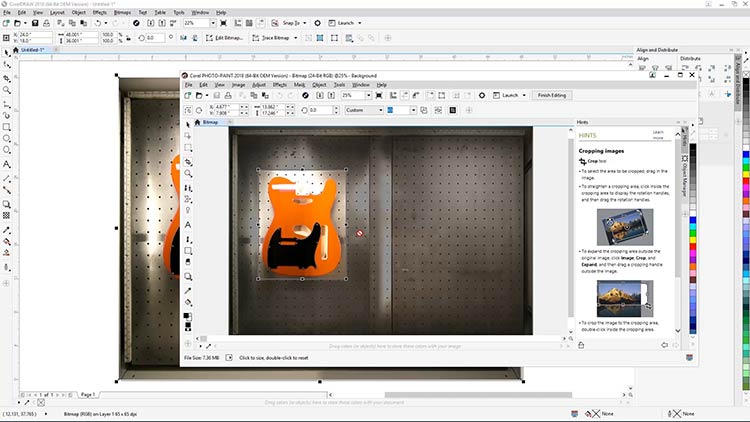
In order to Save this new version and update the pasted image in CorelDRAW, simply press CTRL + S to Save the image or select File > Save at the top of the screen.
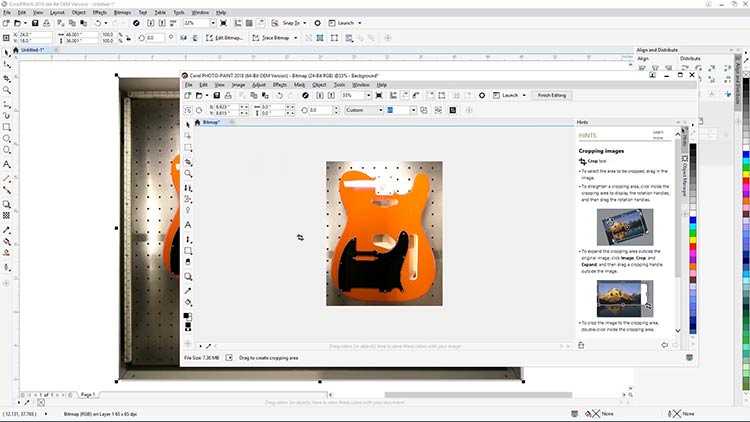
Then close PHOTO-PAINT, and return to CorelDRAW. You’ll see the newly updated version of the background image.
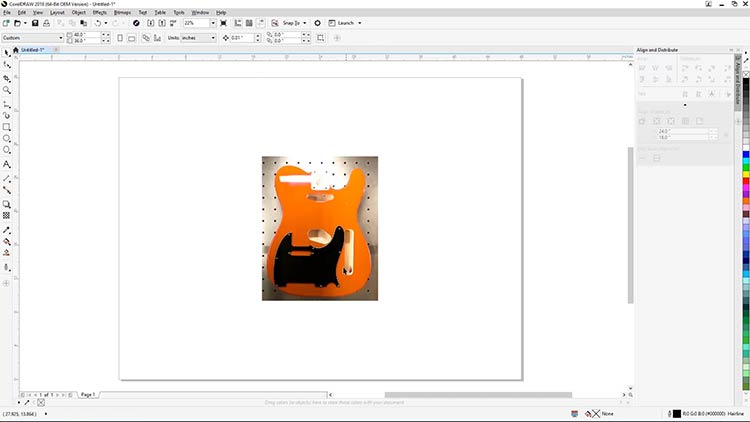
Trace Guitar Shapes
Select the Bezier tool from the tool bar on the left.
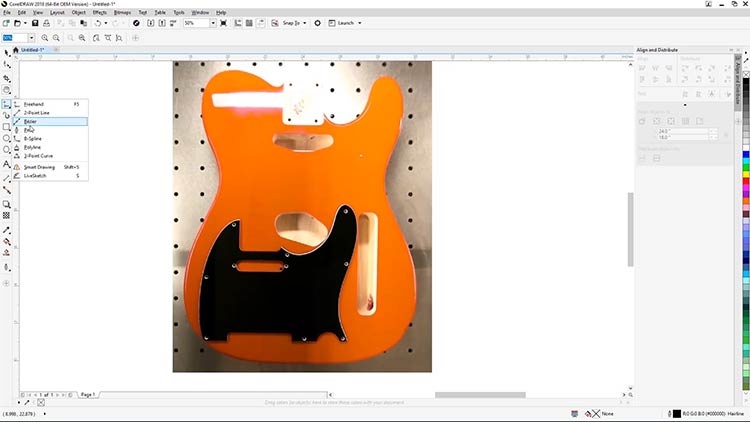
With the Bezier tool selected, trace the outline of the guitar body and the routed-out holes to create your engraving template.
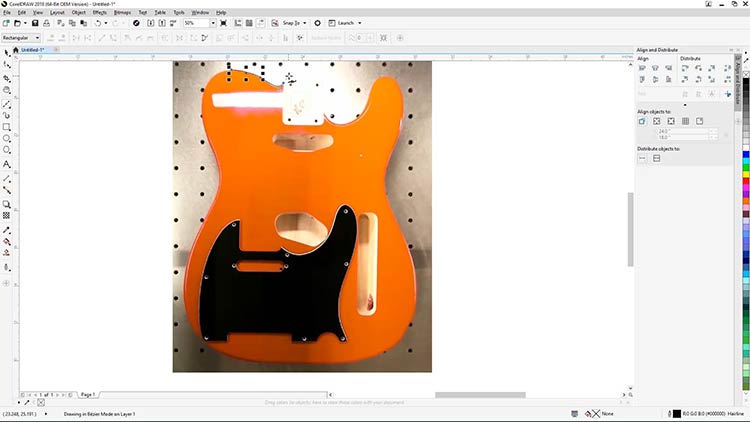
Once you’ve completed tracing the Telecaster guitar body, trace the pickguard as well, and (optionally) the guitar neck headstock.
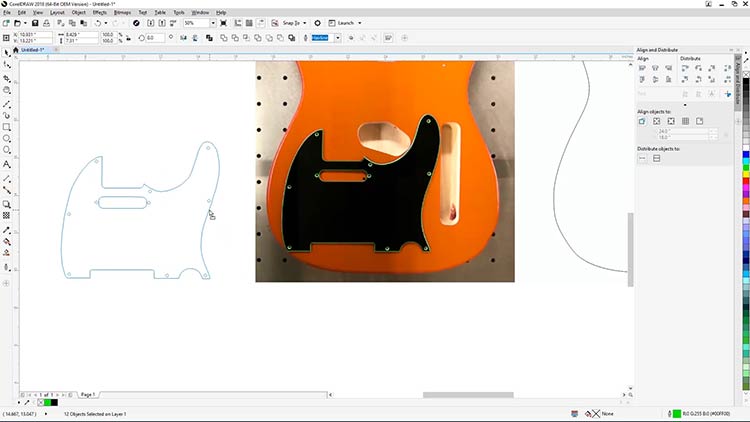
With your outlines completed, now you’re ready to move on to applying graphics to your template.
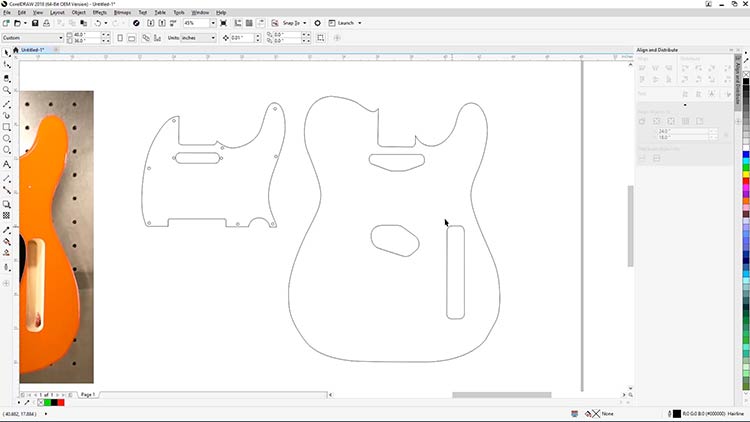
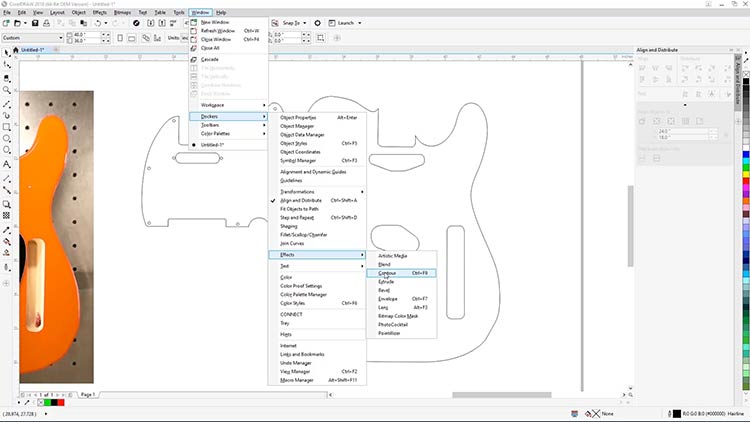
Create Contour Lines
Start by opening the CorelDRAW Contour tool. Select Window > Dockers > Effects > Contour tool from the drop-down menus at the top of the screen.
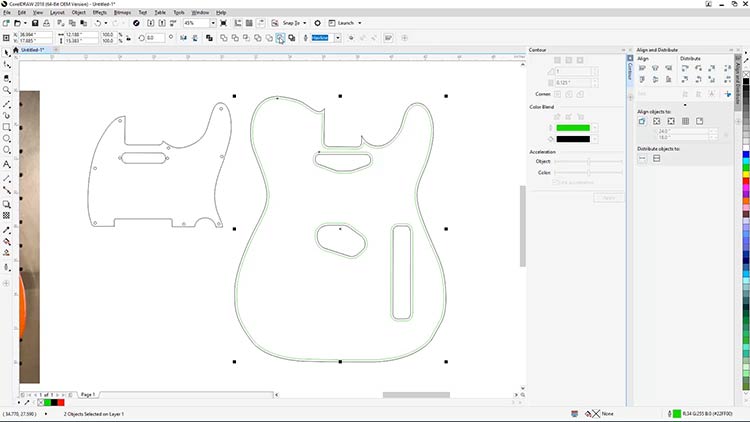
Next, select the outer telecaster body outline, and use the following settings to add an inside border for the body.
- Set the contour to Inside contour
- Set contour steps to 1
- Set contour offset to 0.125”
- Select Green as the outline color
- Then click Apply
Create Borders
Now we’ll create borders for the body cutouts. Start by selecting one of the cutout shapes on the guitar body.
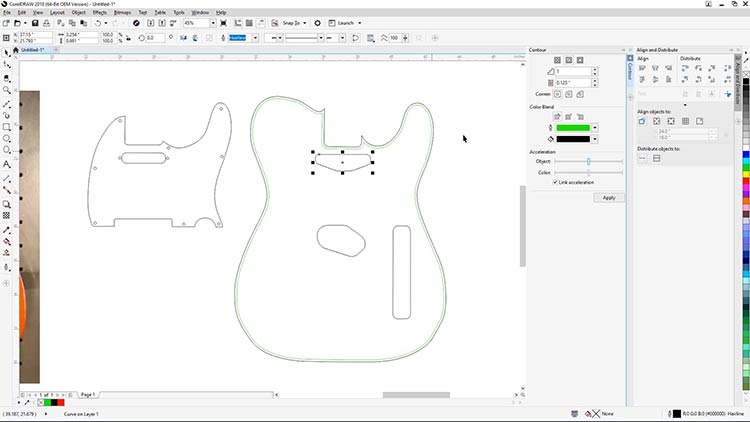
Use the following settings to add an outside border for the cut. In the Contour Tool panel
- Set the contour to Outside contour
- Then click Apply
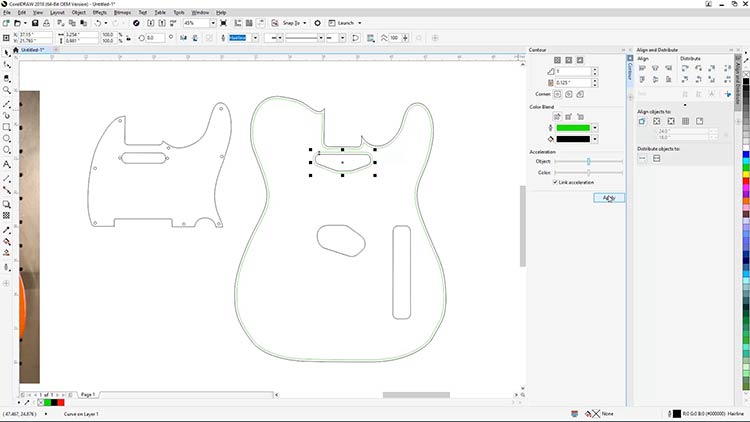
Now, one at a time, select the other body cutout lines and apply the same settings to create the borders for the cutouts.
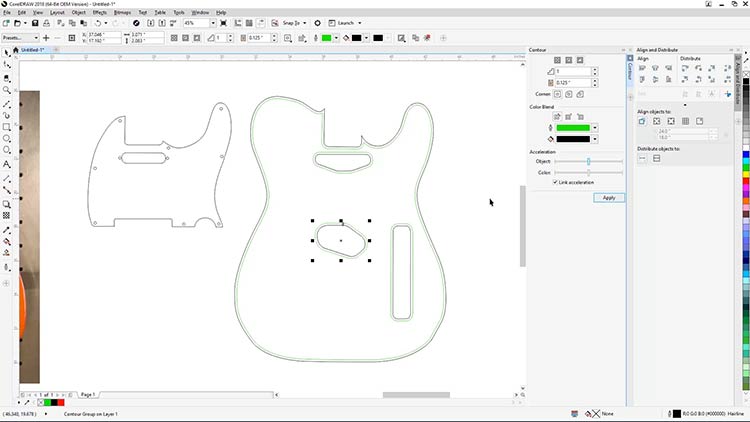
With all the borders created, you’ll now need to break apart the contour group shapes to separate the newly created contour line from the originally traced lines.
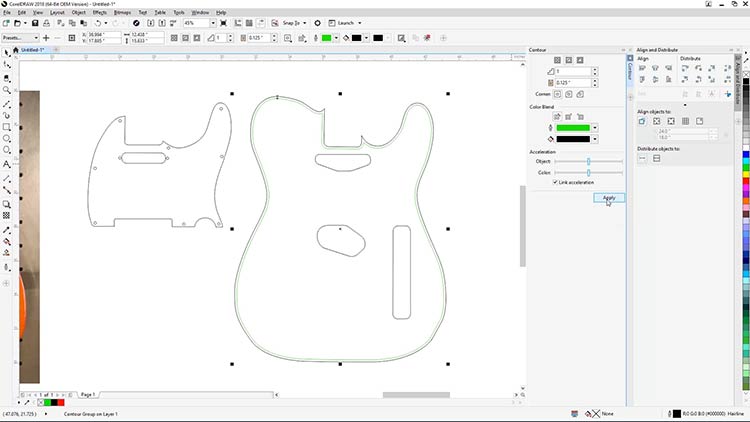
Break Contour Shapes Apart
Select all of the Contour line groupings, then right click on one of the groupings and select Break Apart Contour Group, to separate the Contour lines from the original lines.
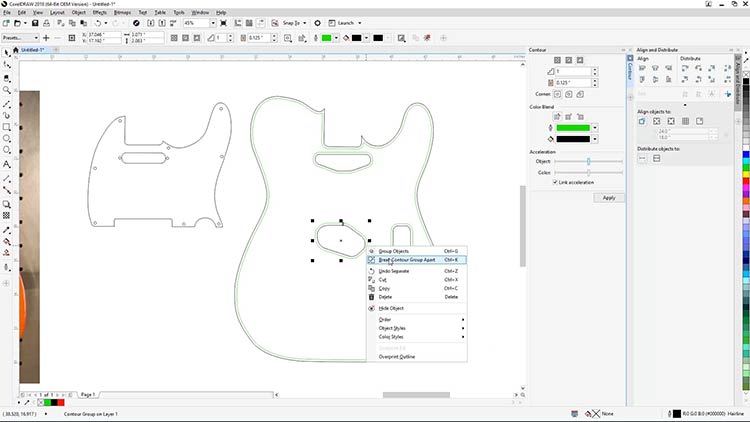
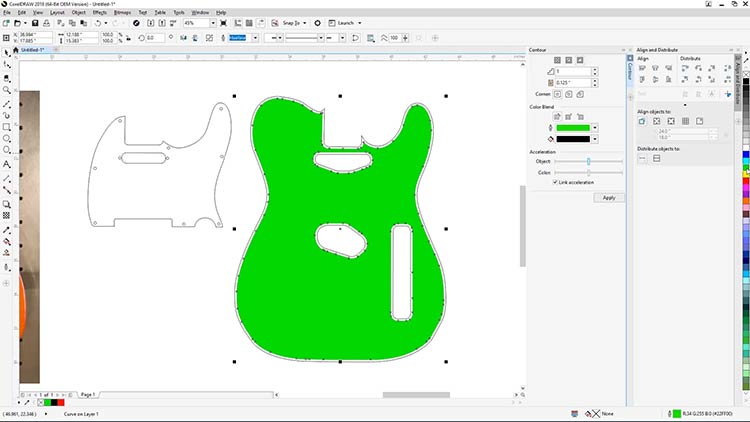
With the green contour lines now separated, select only the green lines, then click the Back Minus Front button, from the Properties bar at the top of the screen, to remove the traced hole objects from the guitar body outline.

Test the results by adding a color fill to the resulting shape. The resulting shape will serve as the template for engraving the Telecaster Guitar body.
Add Stripes to Artwork
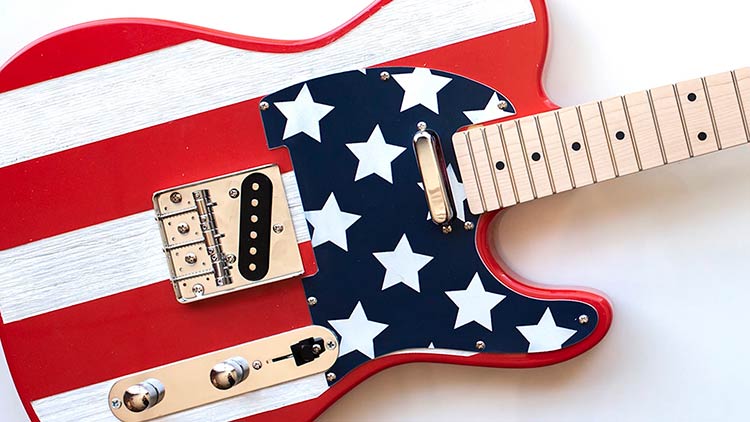
To add the stripes to the body, start by drawing your black filled stripes over the body.
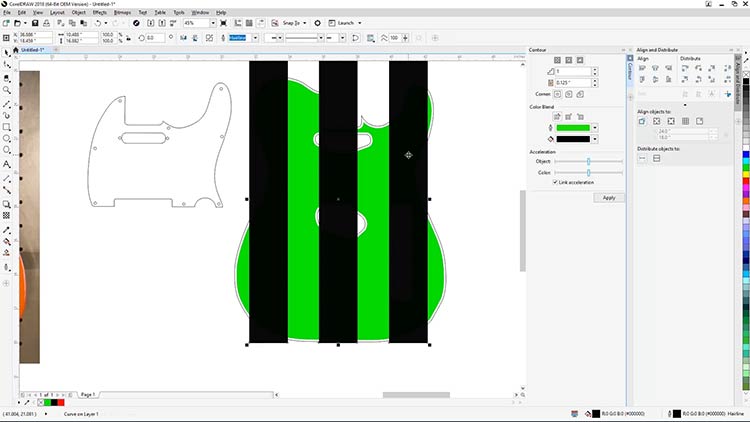
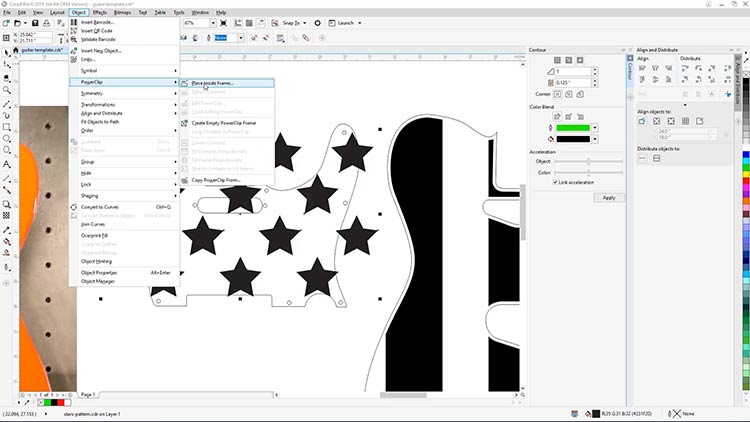
Once you’ve drawn your stripes, select all three stripes, then select Object > PowerClip > Place Inside Frame from the menus at the top of the screen, and click on the guitar body template to place the stripes inside the container.
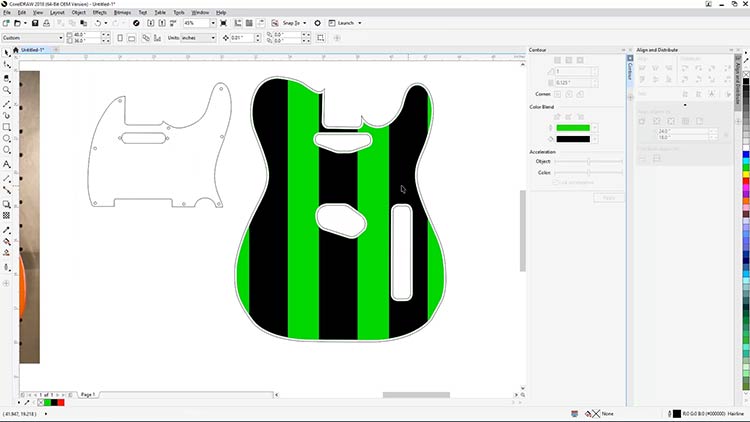
Once you’re finished, we’ll select only the pickguard outline and the Neck Pickup hole, then select Back Minus Front from the Properties bar at the top of the screen to remove the hole from the pickguard outline.
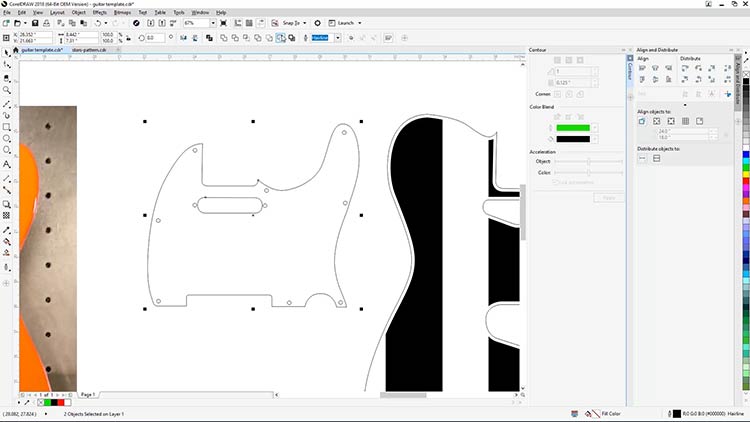
Now we’re ready to add the star pattern to the pickguard. Press CTRL + I, or select File > Import from the dropdown menu options at the top of the screen.
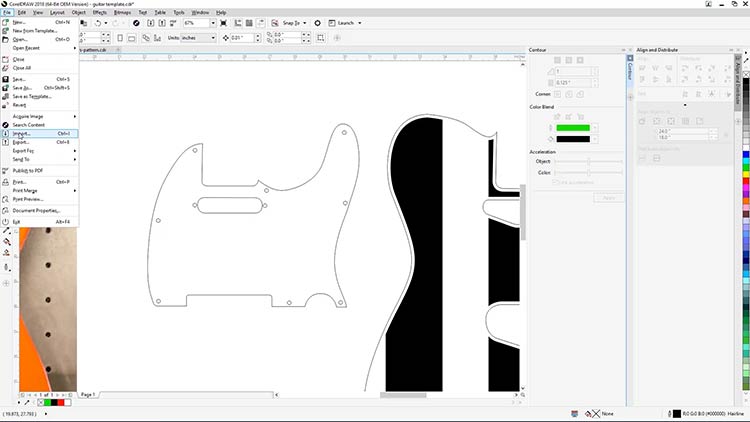
Then select the stars-pattern.eps file (download the file using the button near the top of the page) from its saved location on your computer, and press Import.
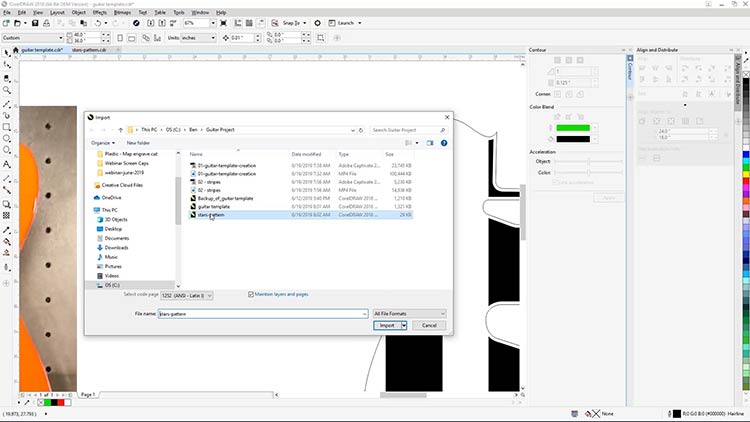
Now click on your workspace to place the stars pattern.
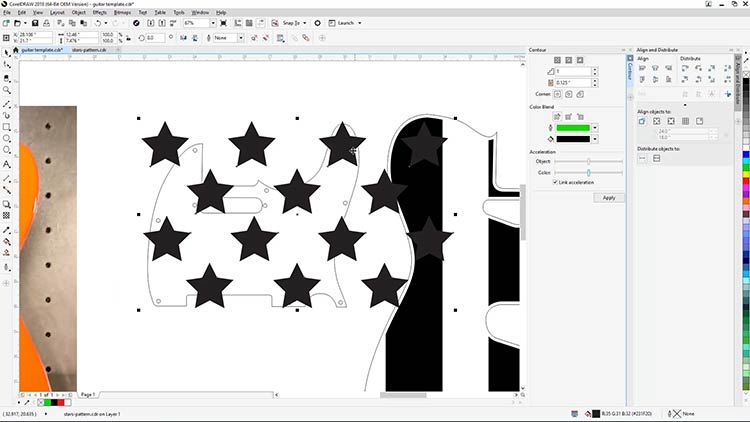
With the star pattern placed into your work area, we’ll now move, scale, and PowerClip the star pattern inside your pickguard template.
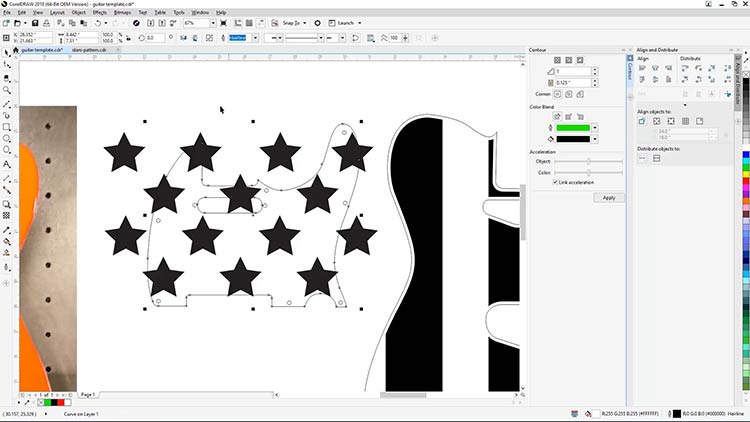
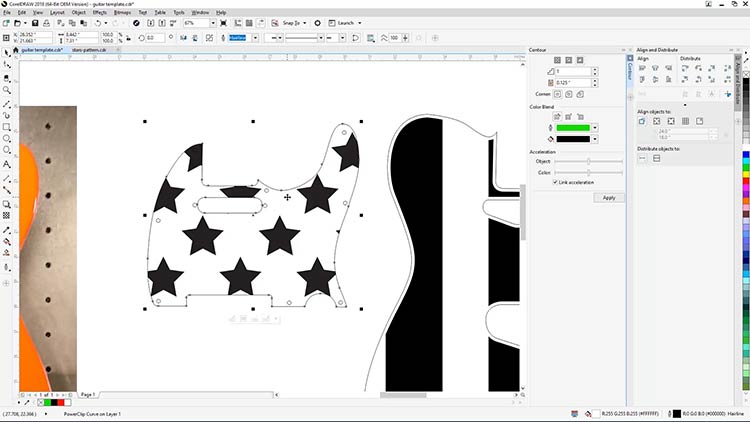
Once you’ve finished adjusting the star pattern for the pickguard, select Object > PowerClip > Place Inside Frame, and click on the pickguard to place the stars inside your template.
Add Star Pattern
The guitar body and pickguard are now ready to be sent to the laser.
Print to the Epilog Dashboard
Select just the guitar body template, then print the job to the Epilog Laser Dashboard.
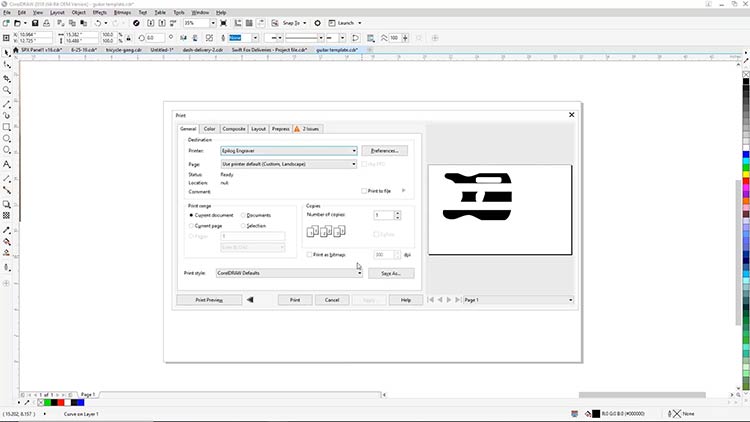
With the guitar body in the laser, the top door closed, and the material in focus, you’ll now see a preview of the guitar body and your graphics in the Dashboard.
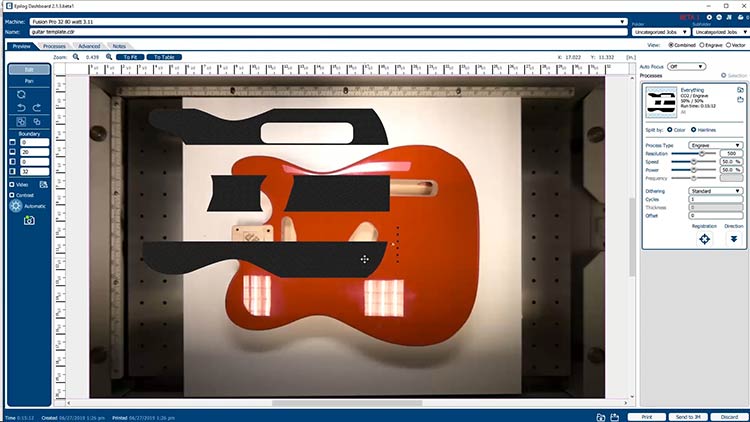
Click and move the graphics over the guitar body until they are visually aligned to the guitar body.
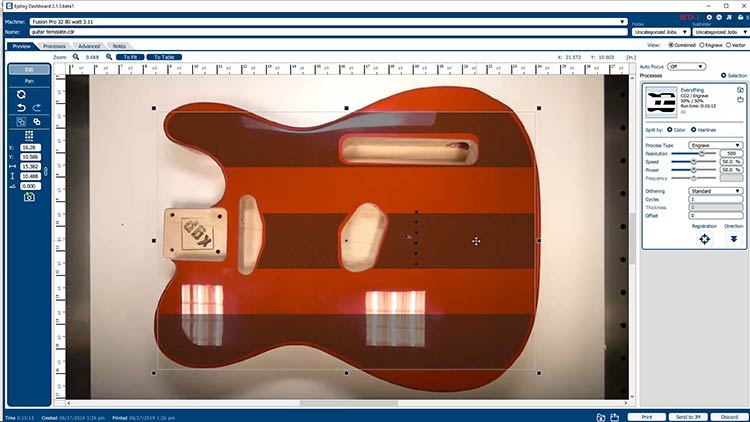
Print to Epilog Laser
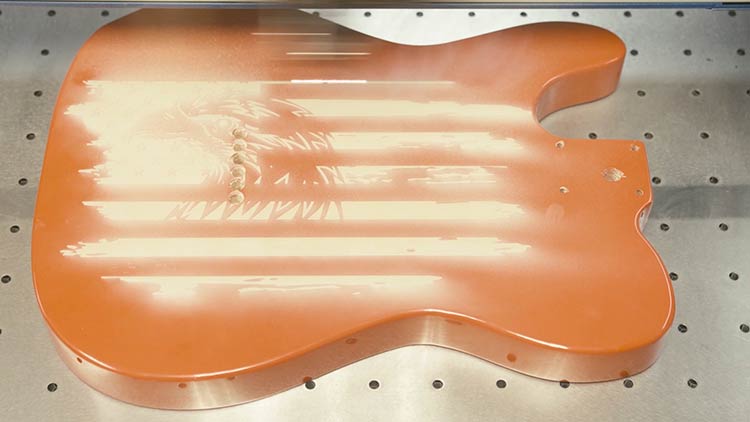
Once you have your graphics placed, adjust the laser parameters and settings for the material then print the job to the laser and start the job.
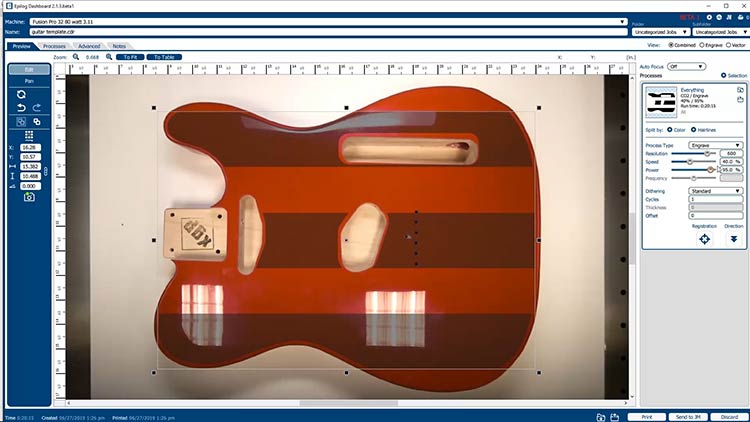
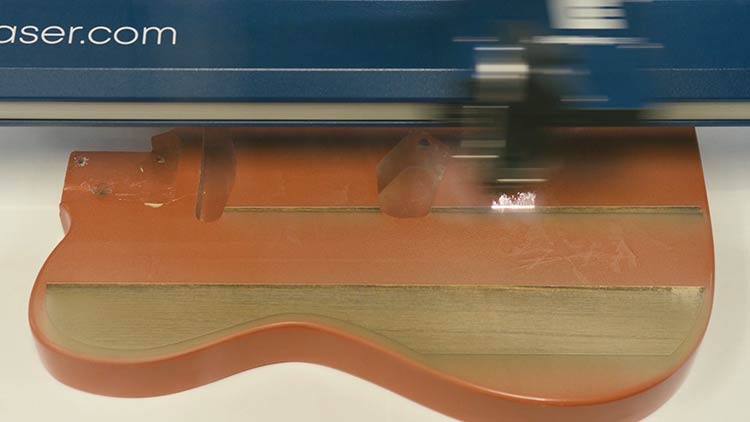
Repeat these same steps for cutting and engraving your pickguard and optional neck headstock.
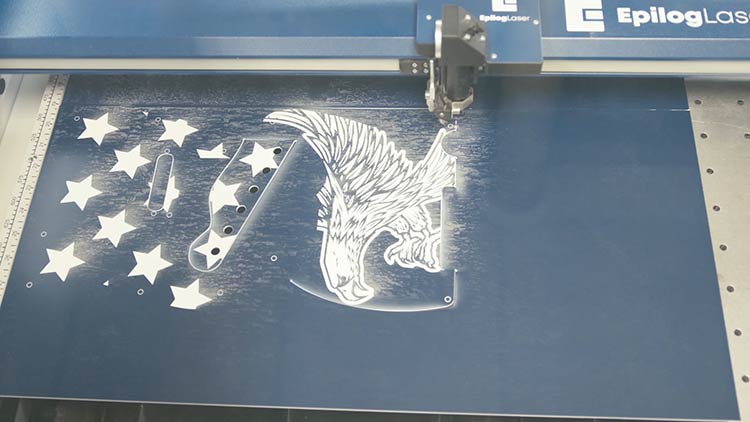
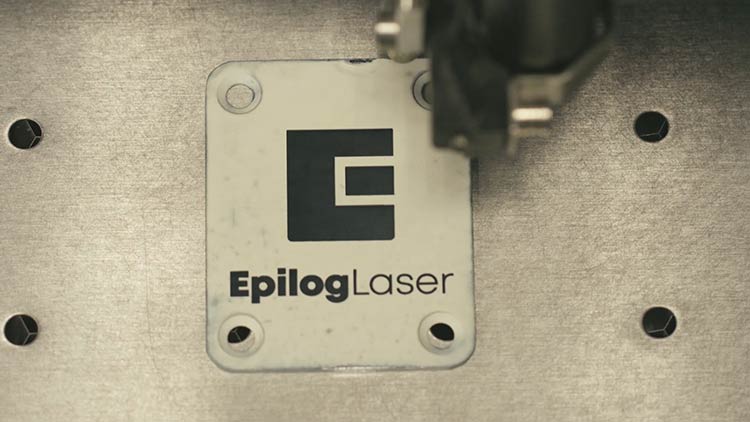
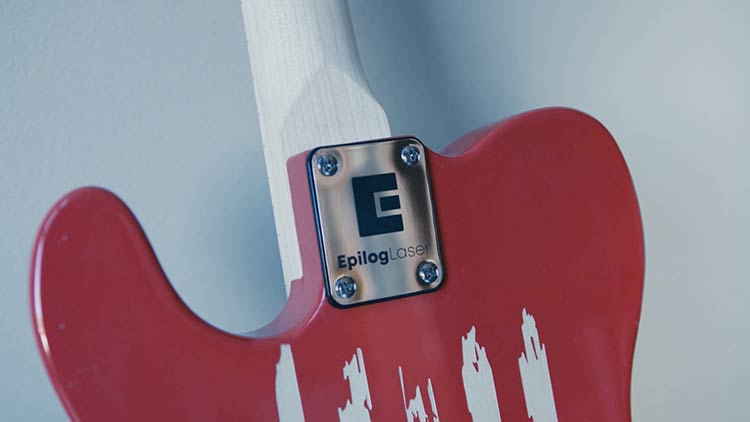
Additionally, we’ve engraved the back of the guitar body and the guitar neck plate to make this project one of a kind.
Apply Finishing Touches
Once you have all of your guitar parts engraved, finish any additional steps, such as color filling the stripes. We used white acrylic paint to help drive home the stars and stripes motif.
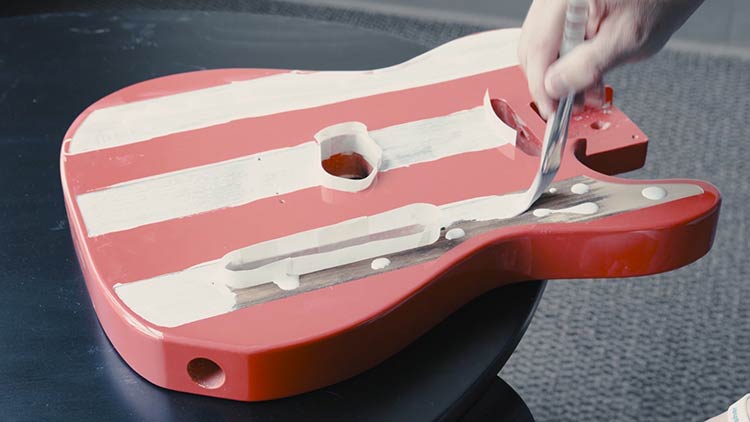
Then follow the assembly instruction provided with your guitar kit to finish your 4th-themed guitar project!


Where can you sell custom laser engraved instruments?
- Specialty gift stores
- Silent auctions and fundraisers
- Birthday or anniversary gifts
