Step 1: Adobe Firefly – AI Artwork Generator
Start by visiting Adobe’s AI Artwork Generator Firefly at https://firefly.adobe.com/
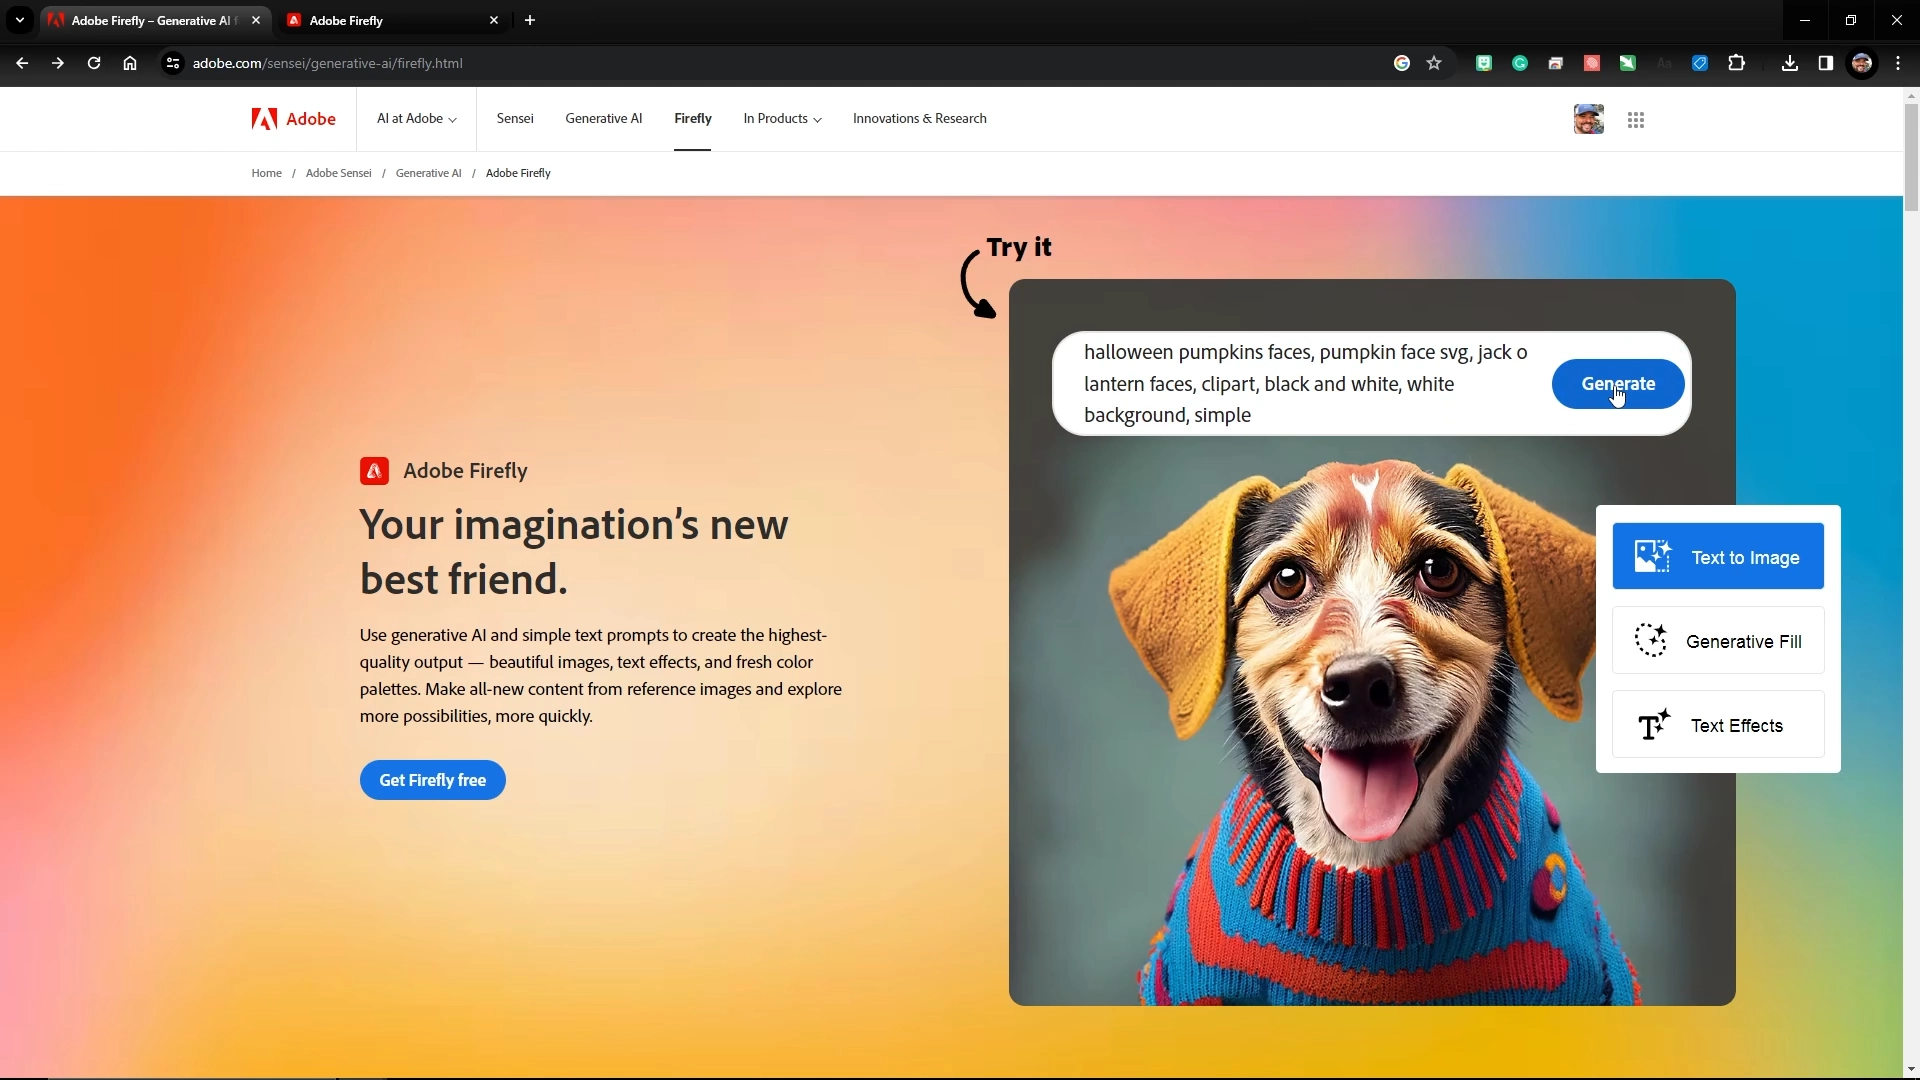
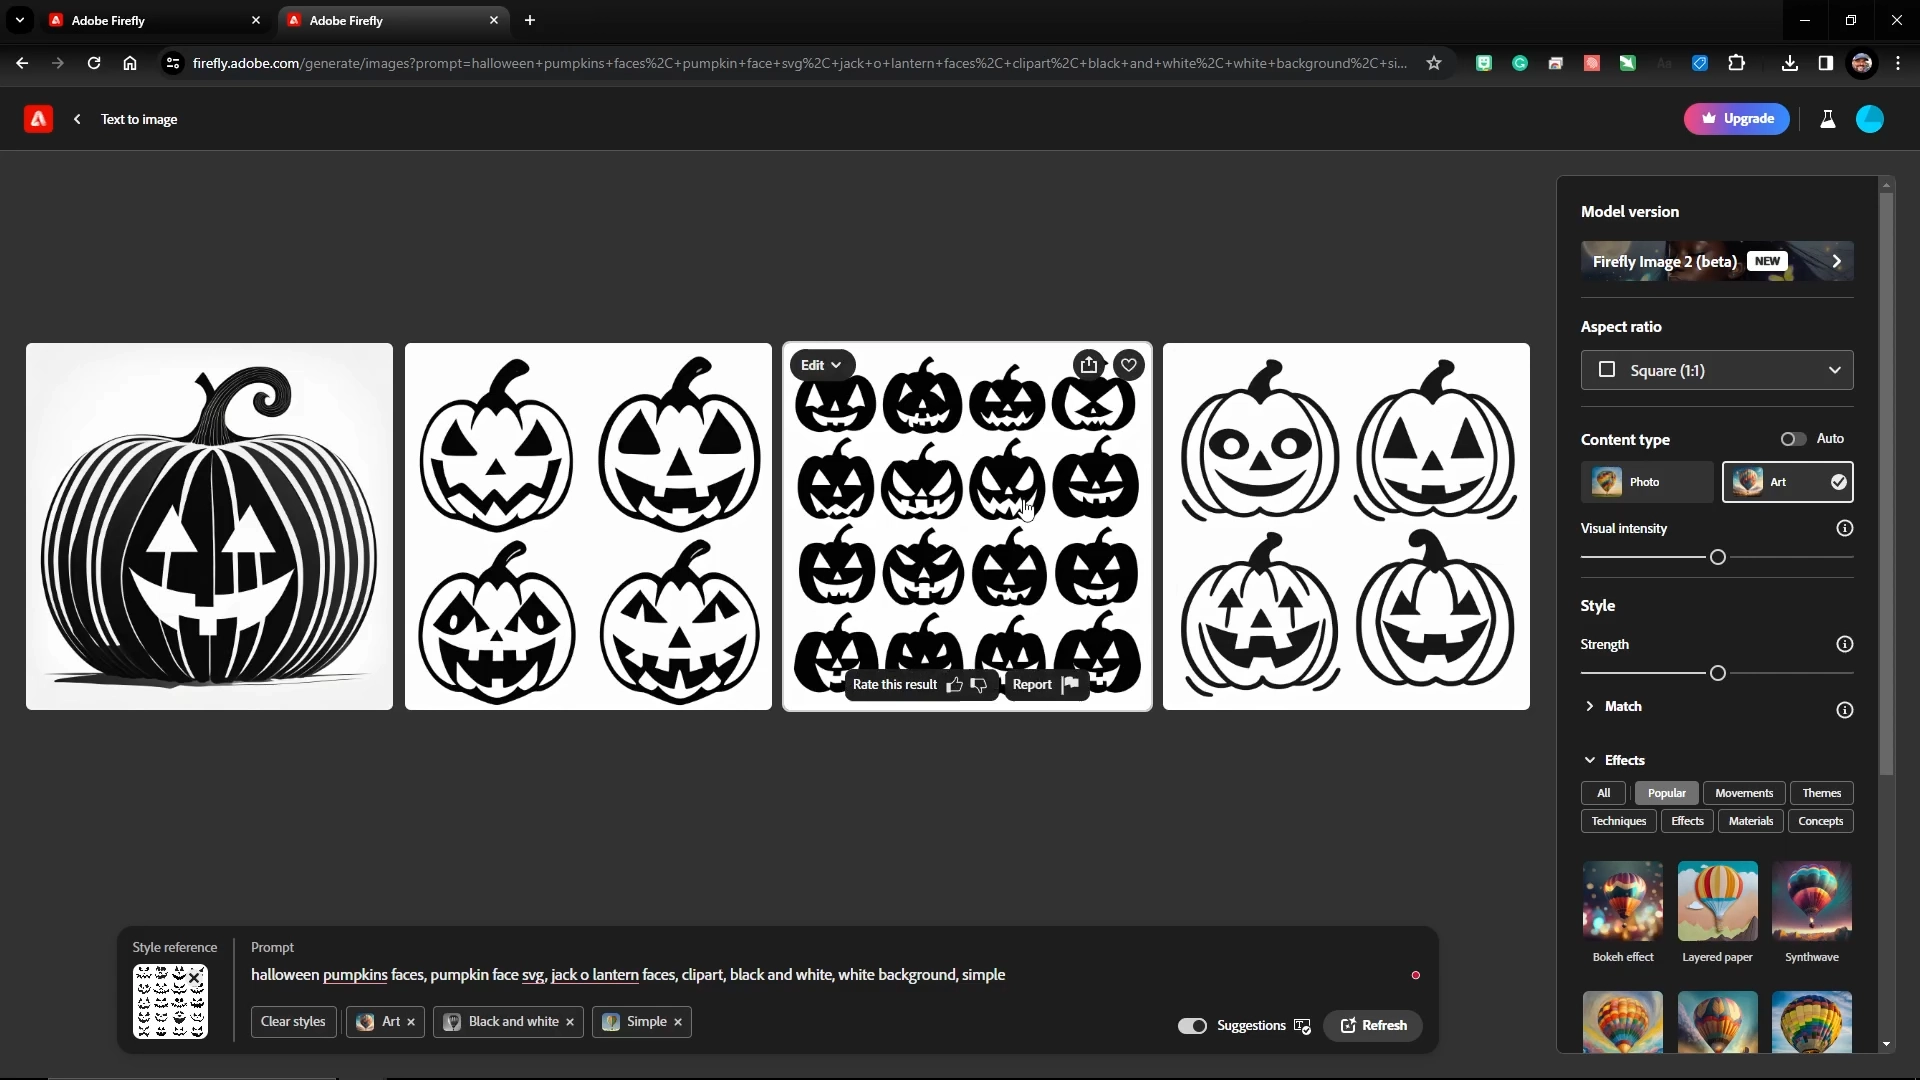
Step 2: Pumpkin Face Artwork – AI Artwork Prompts
Enter a descriptive and specific prompt to generate a variety of pumpkin faces for the pumpkin lantern. We used these description prompts to create some pumpkin face options. Being as specific and descriptive will help yield better output.
Adobe Firefly Prompt: “Halloween pumpkin faces, pumpkin face svg, jack-o-lantern faces, clipart, black and white, white background, simple.”
Once you see the designs you like, click on the download option in the top-right corner of the option.
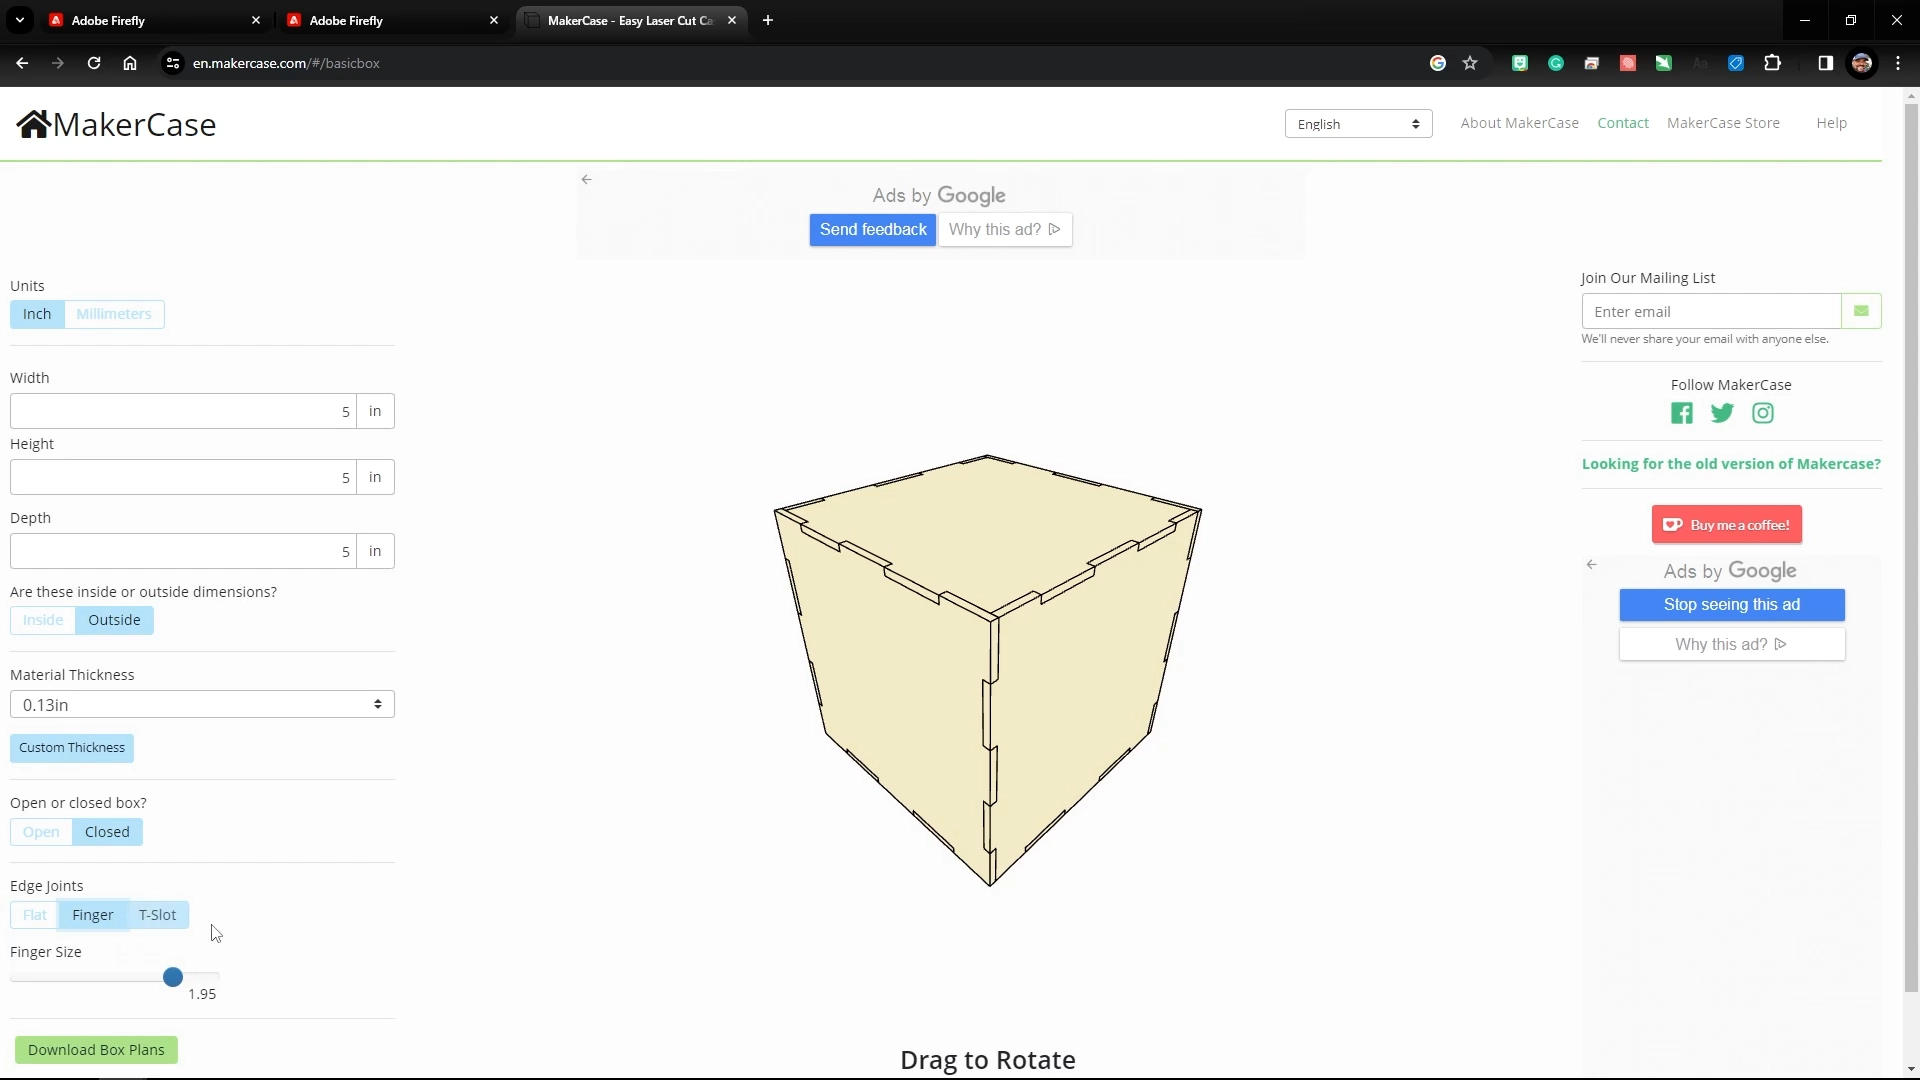
Step 3: MakerCase – Box and Case Creator
Next, we’ll use a box generator to create a design to complete our pumpkin lantern design. Start by visiting https://en.makercase.com. Select the Simple Box design option, and enter the following specs into the various prompts to create a box that will fit on a single 24” x 12” sheet of wood.
Width: 5 in.
Height: 5 in.
Depth: 5 in.
Material Thickness: 0.13 in.
Open or closed box: Closed
Edge Joints: Finger
Finger Join Size: 1.95”
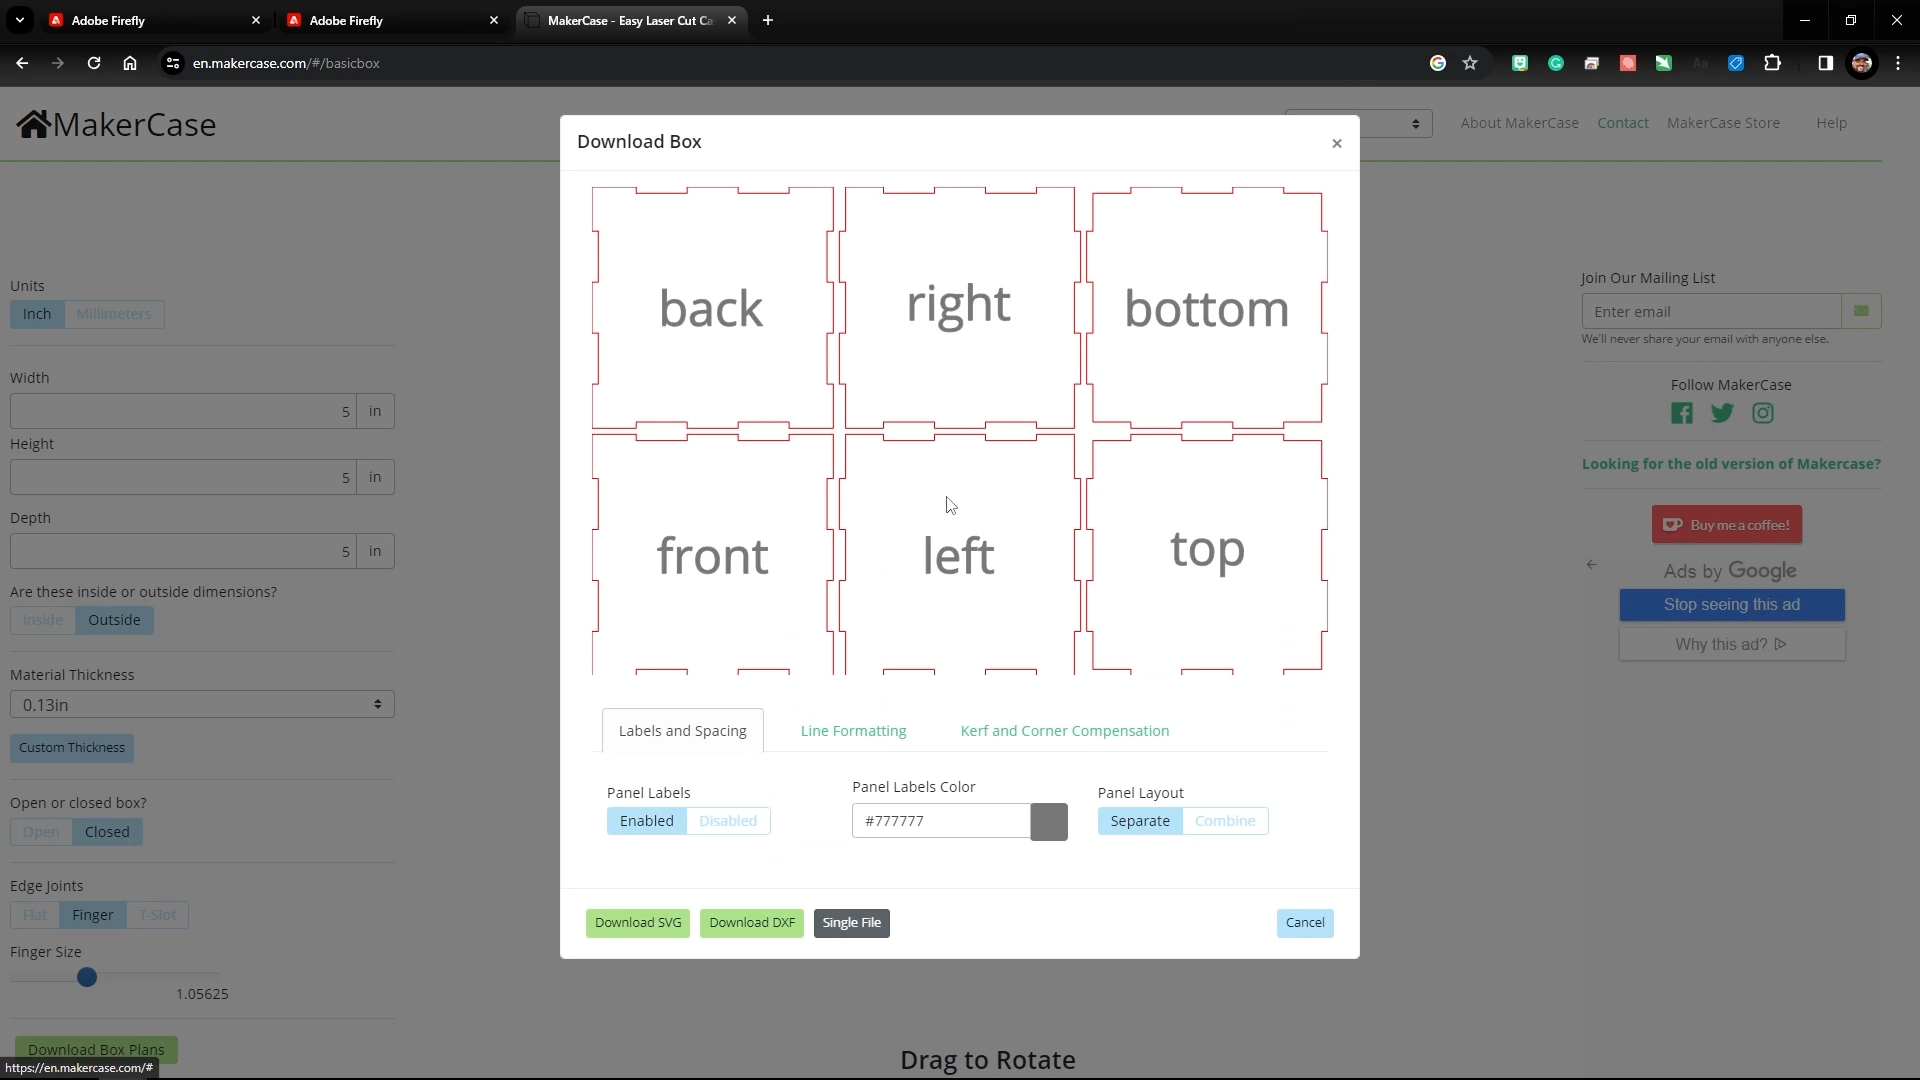
Then click the “Download Box Plans” button to generate your design’s flat laser cut line plans and select the Download SVG option to save the design.
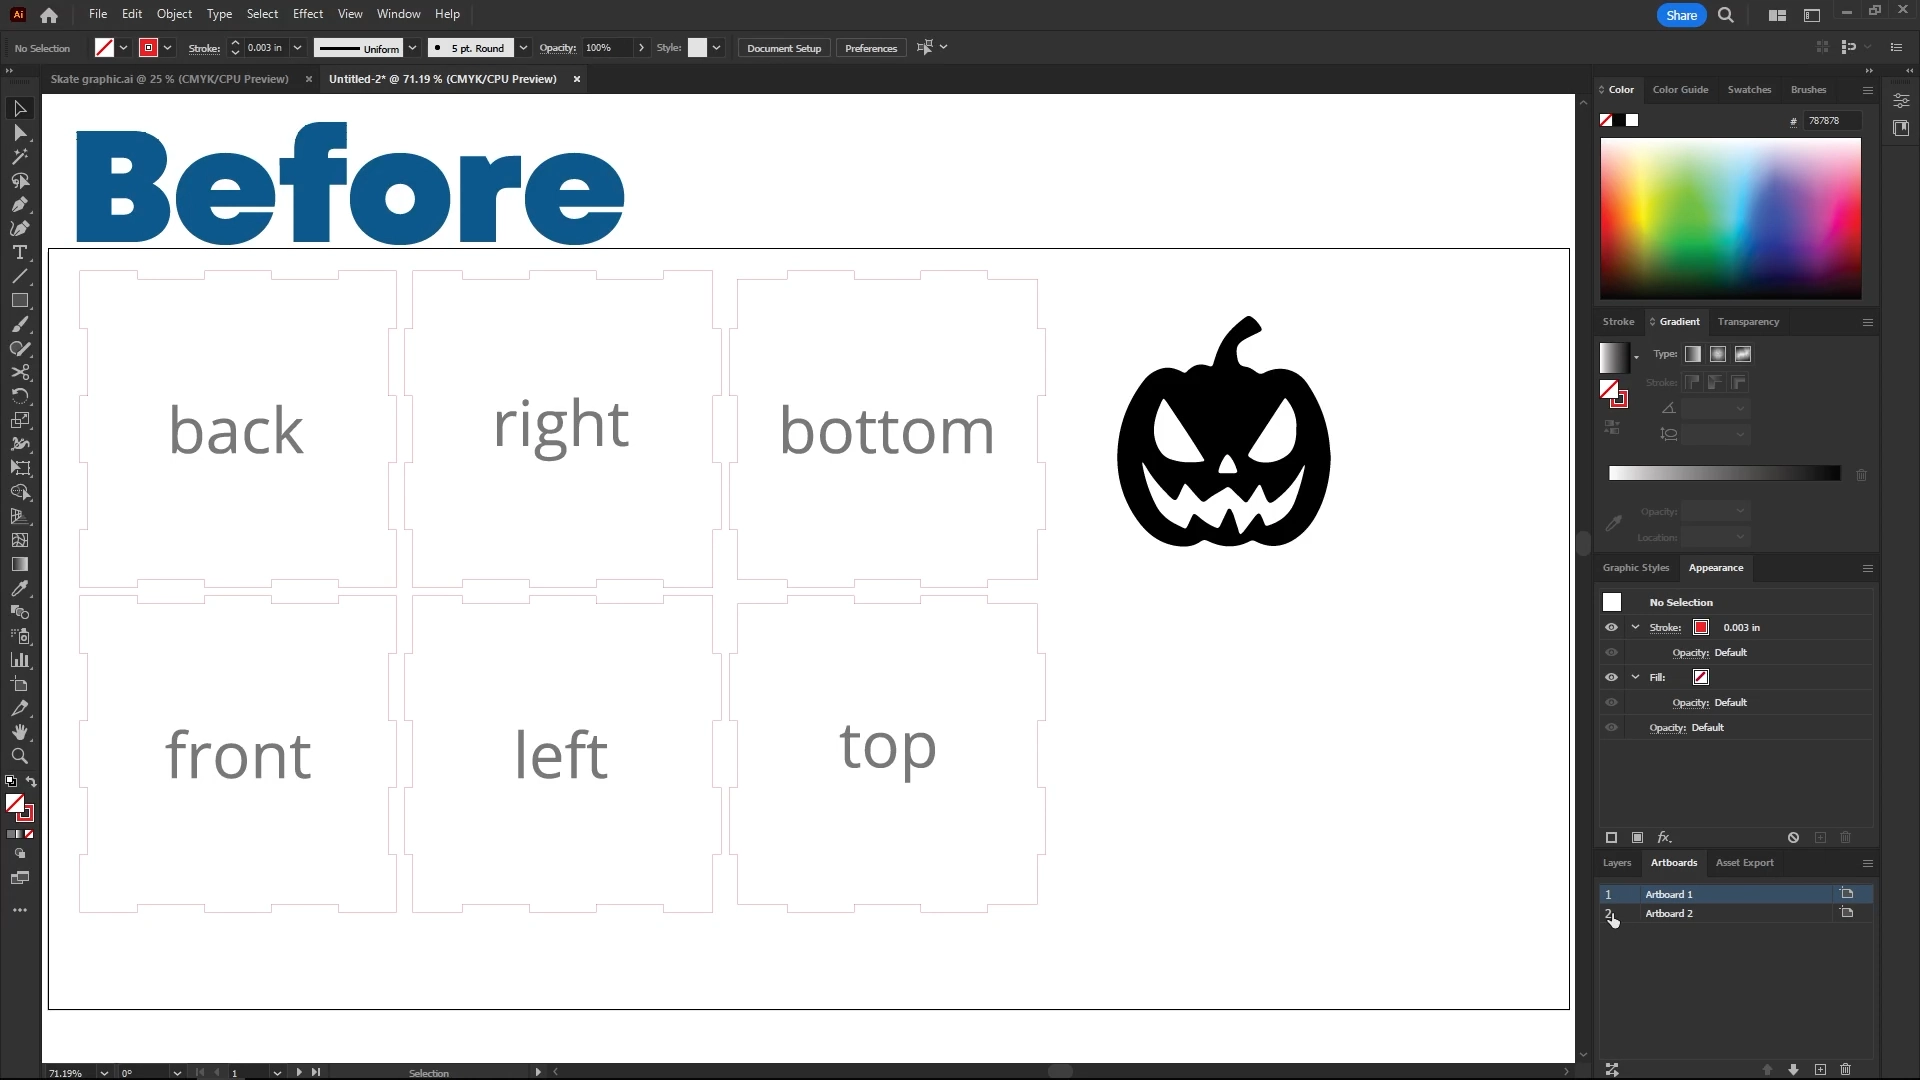
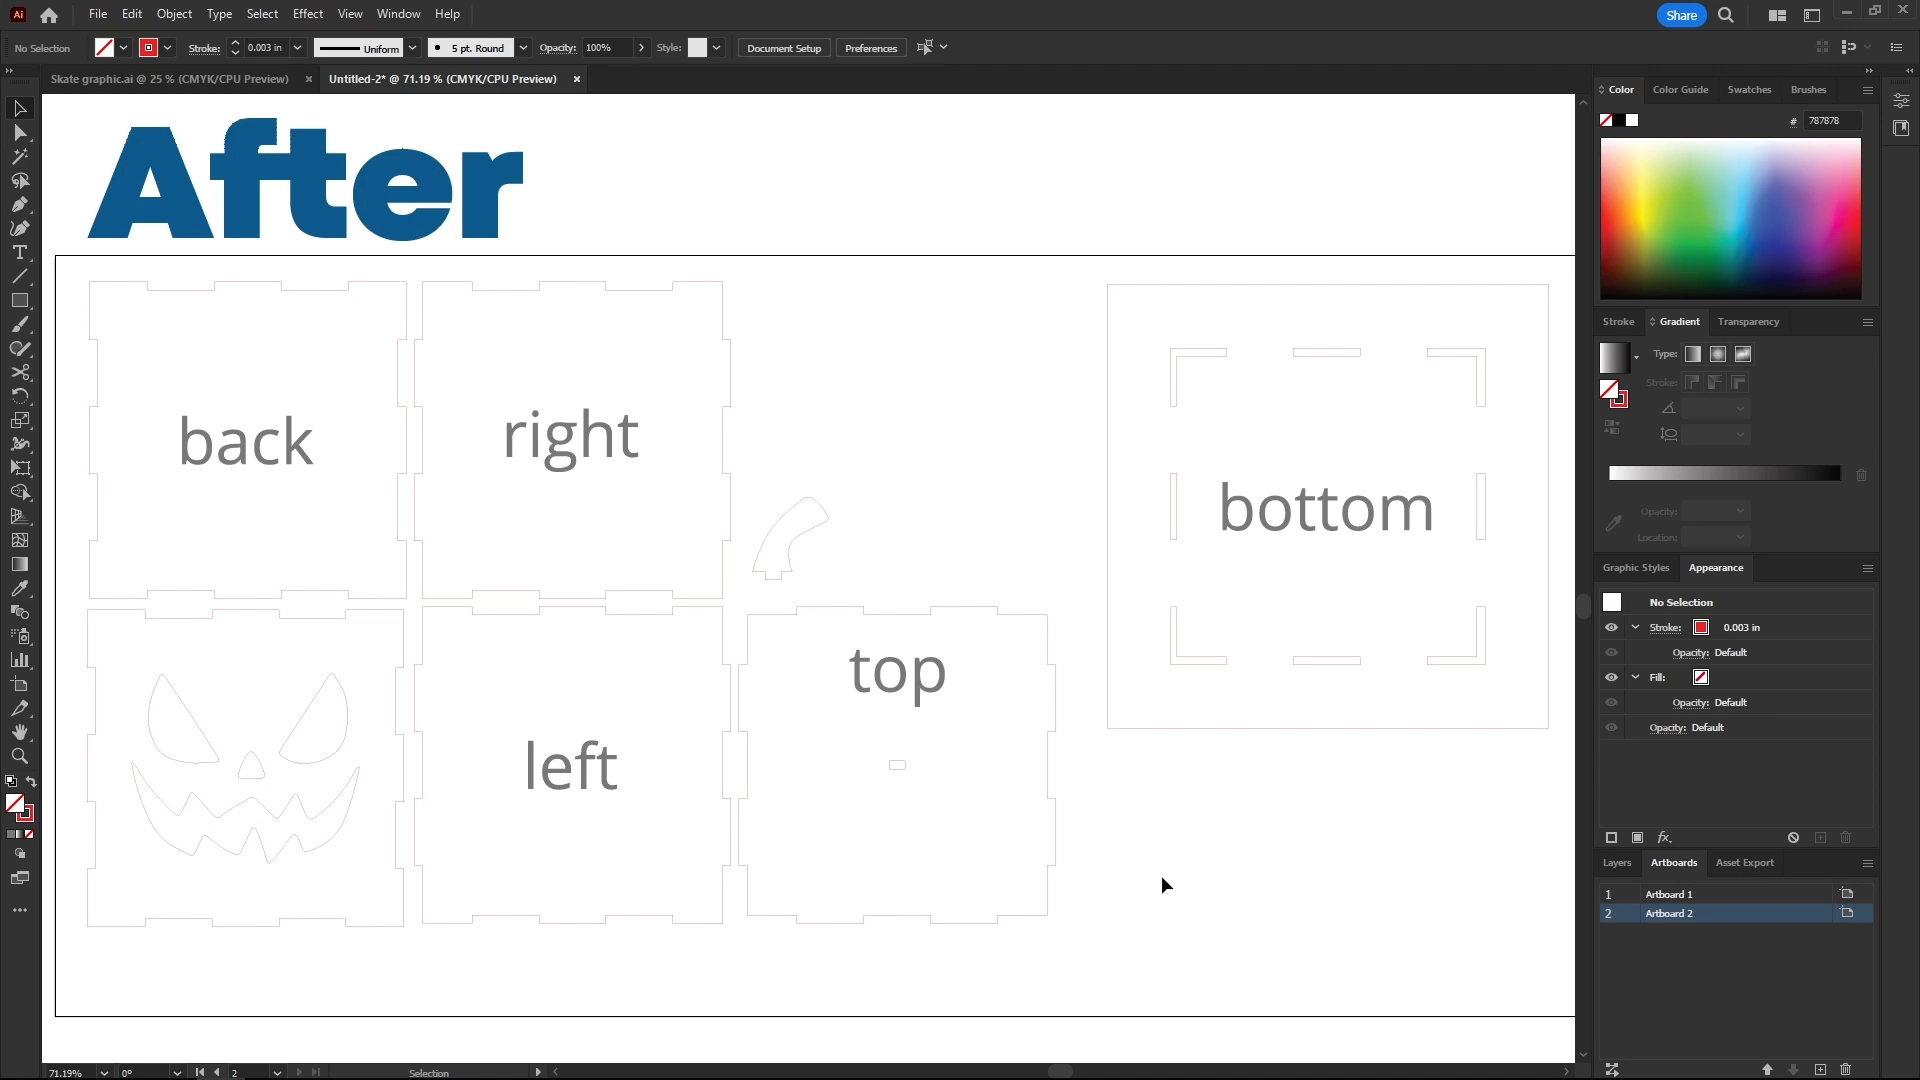
Step 4: Adobe Illustrator – Artwork Setup
In Adobe Illustrator, we’ve combined the AI-generated pumpkin face and MakerCase box designs to form the available Pumpkin Lantern artwork.
Step 5: Send Artwork to the Epilog Dashboard
Within Adobe Illustrator, print the design to the Epilog Laser Dashboard.
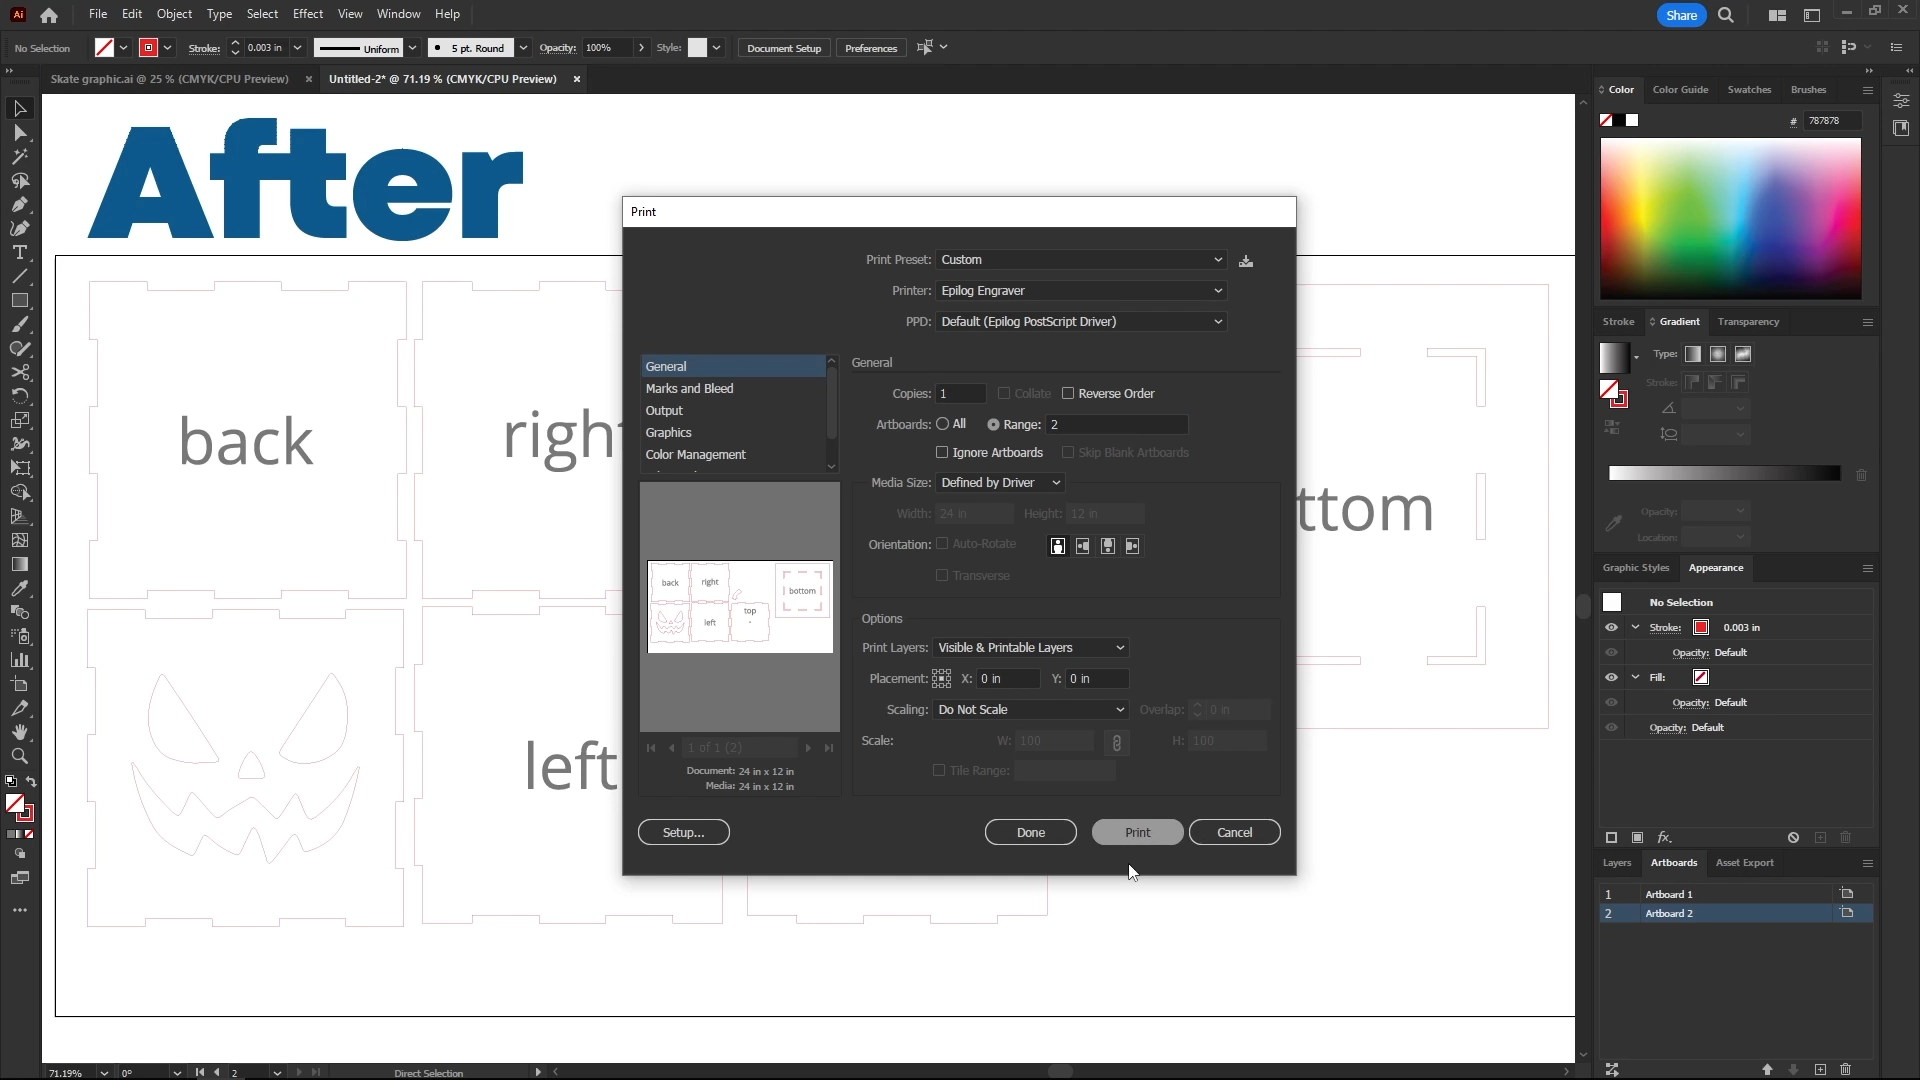
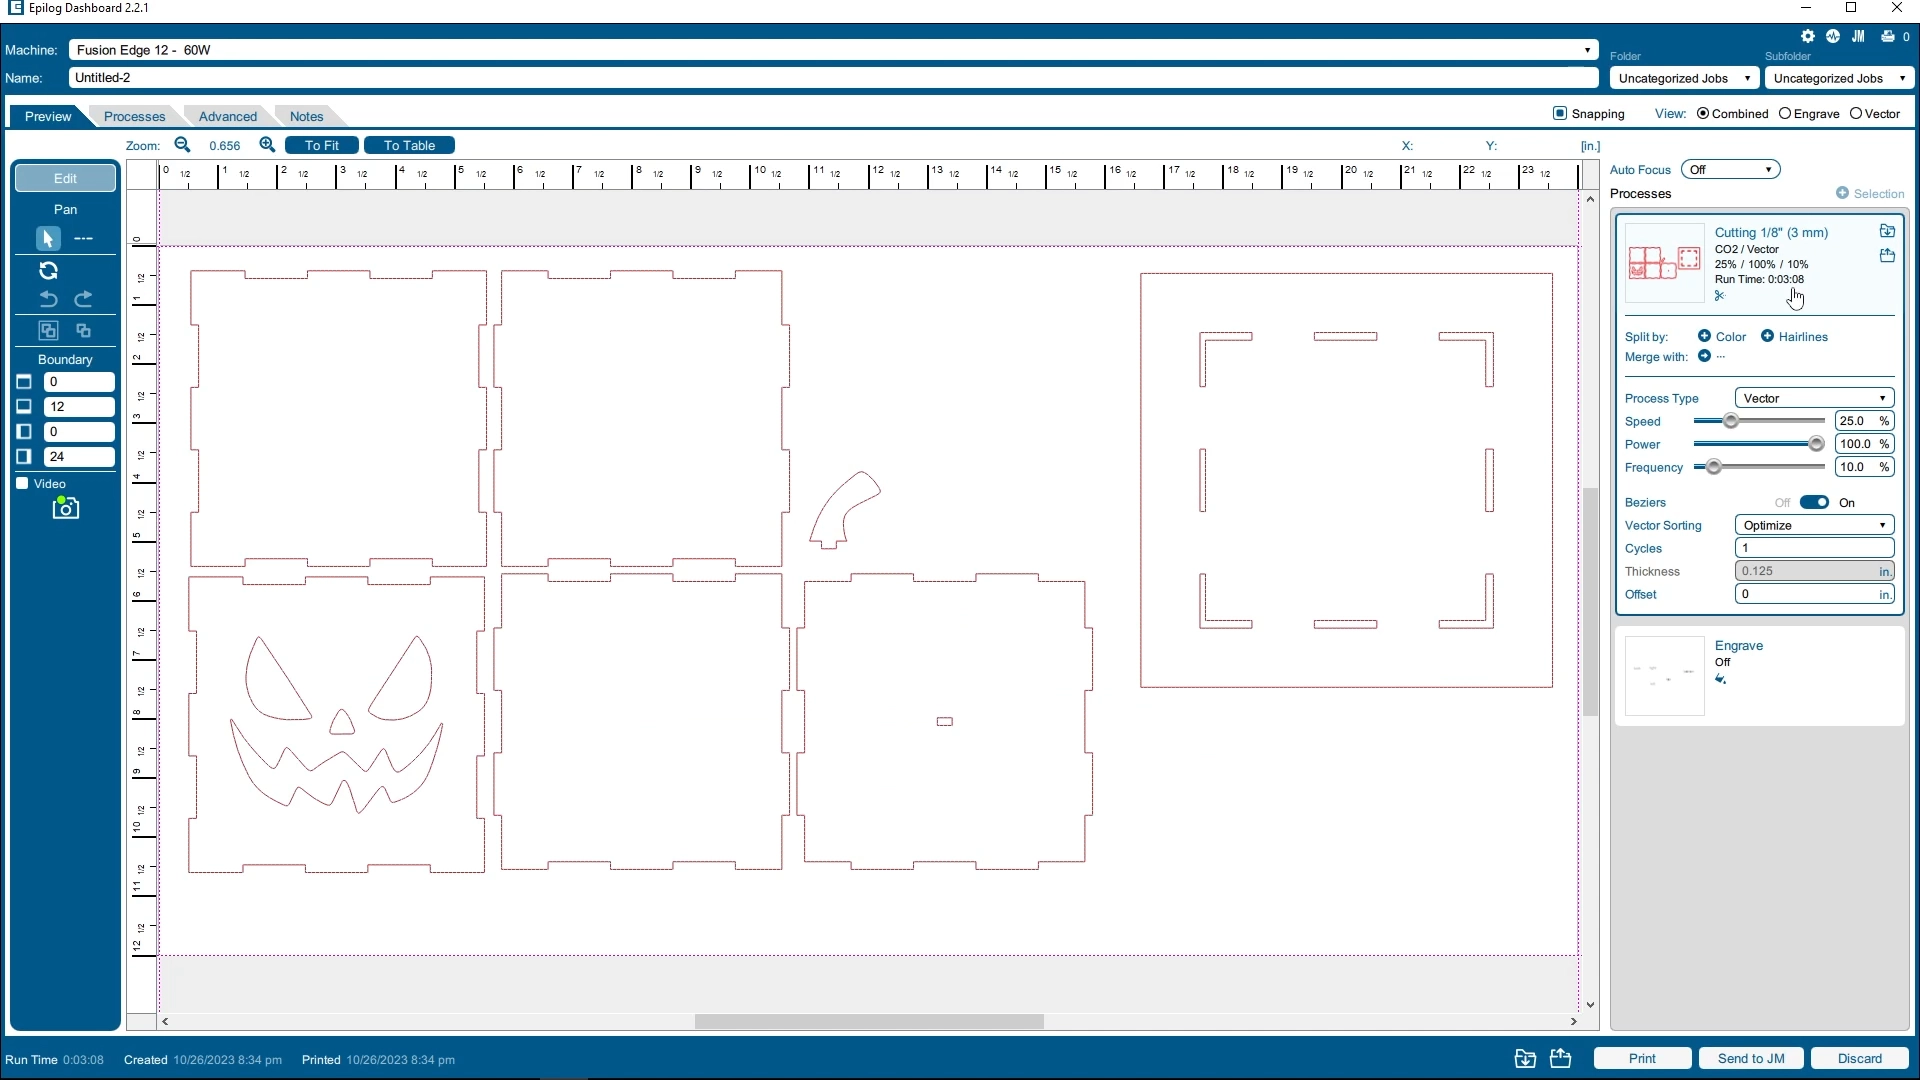
Step 6: Dashboard Print Settings
Within the Epilog Dashboard, we’ve turned off the IRIS Camera, turned off the black engraving process, and added our cut lines settings to cut the pumpkin box lantern design. With the laser job now set up, click the Print button to send it to the laser.
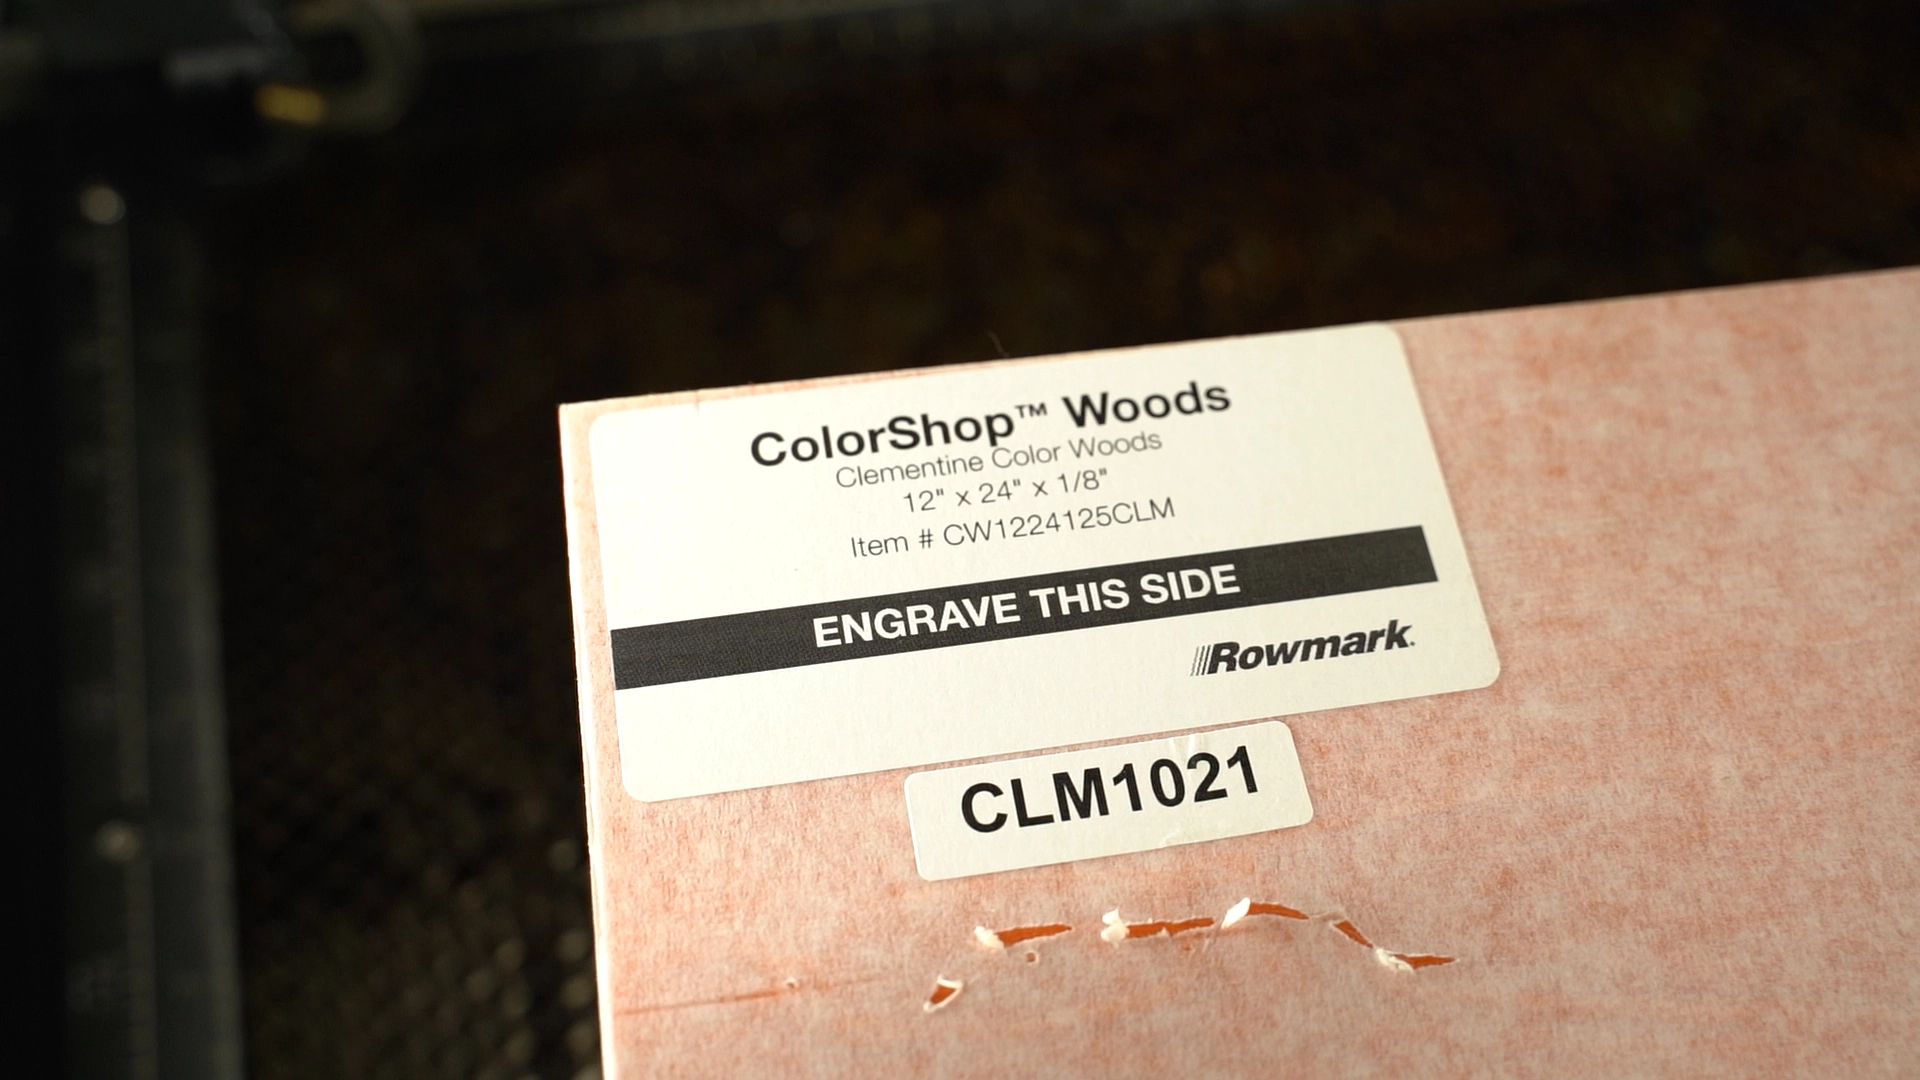
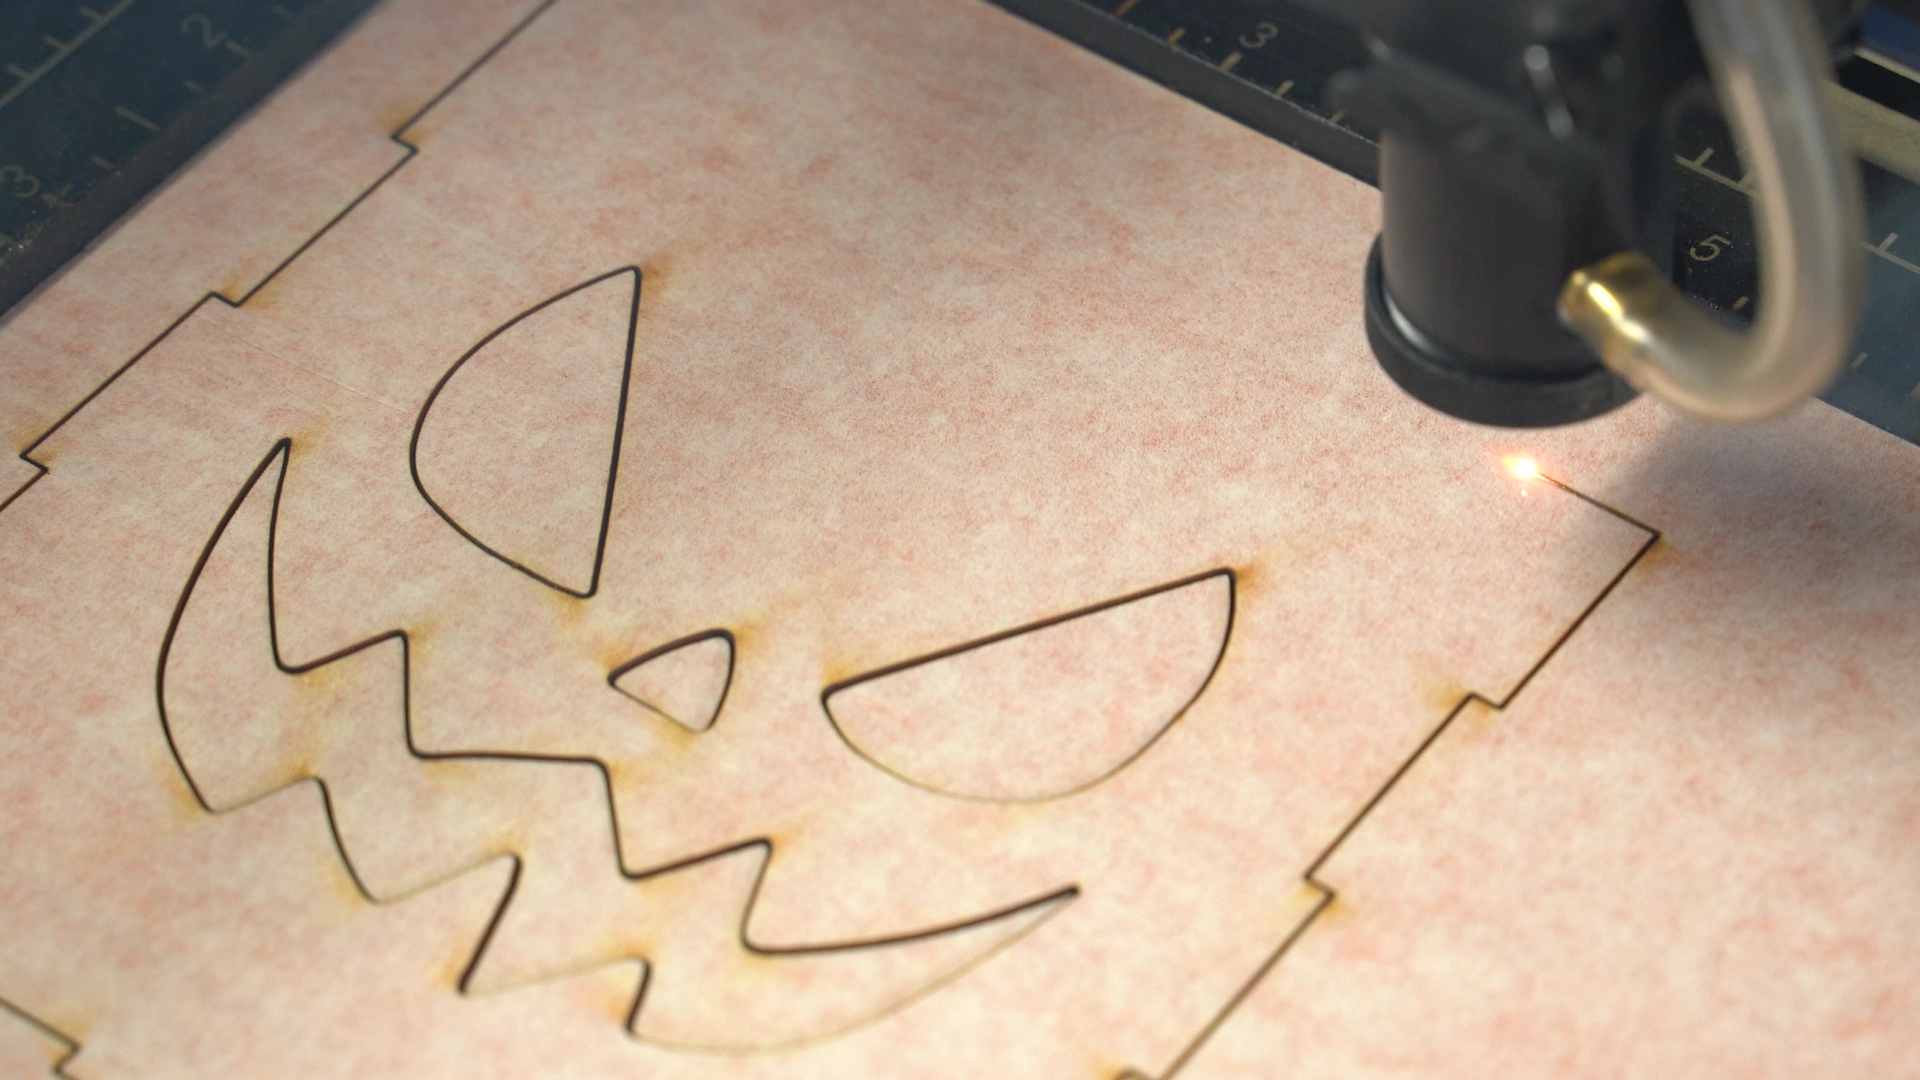
Step 7: Place Your Material and Auto-Focus
At the laser, place your material into the laser and use the auto-focus feature at the control panel to bring your material into focus. Then press Go at the laser!
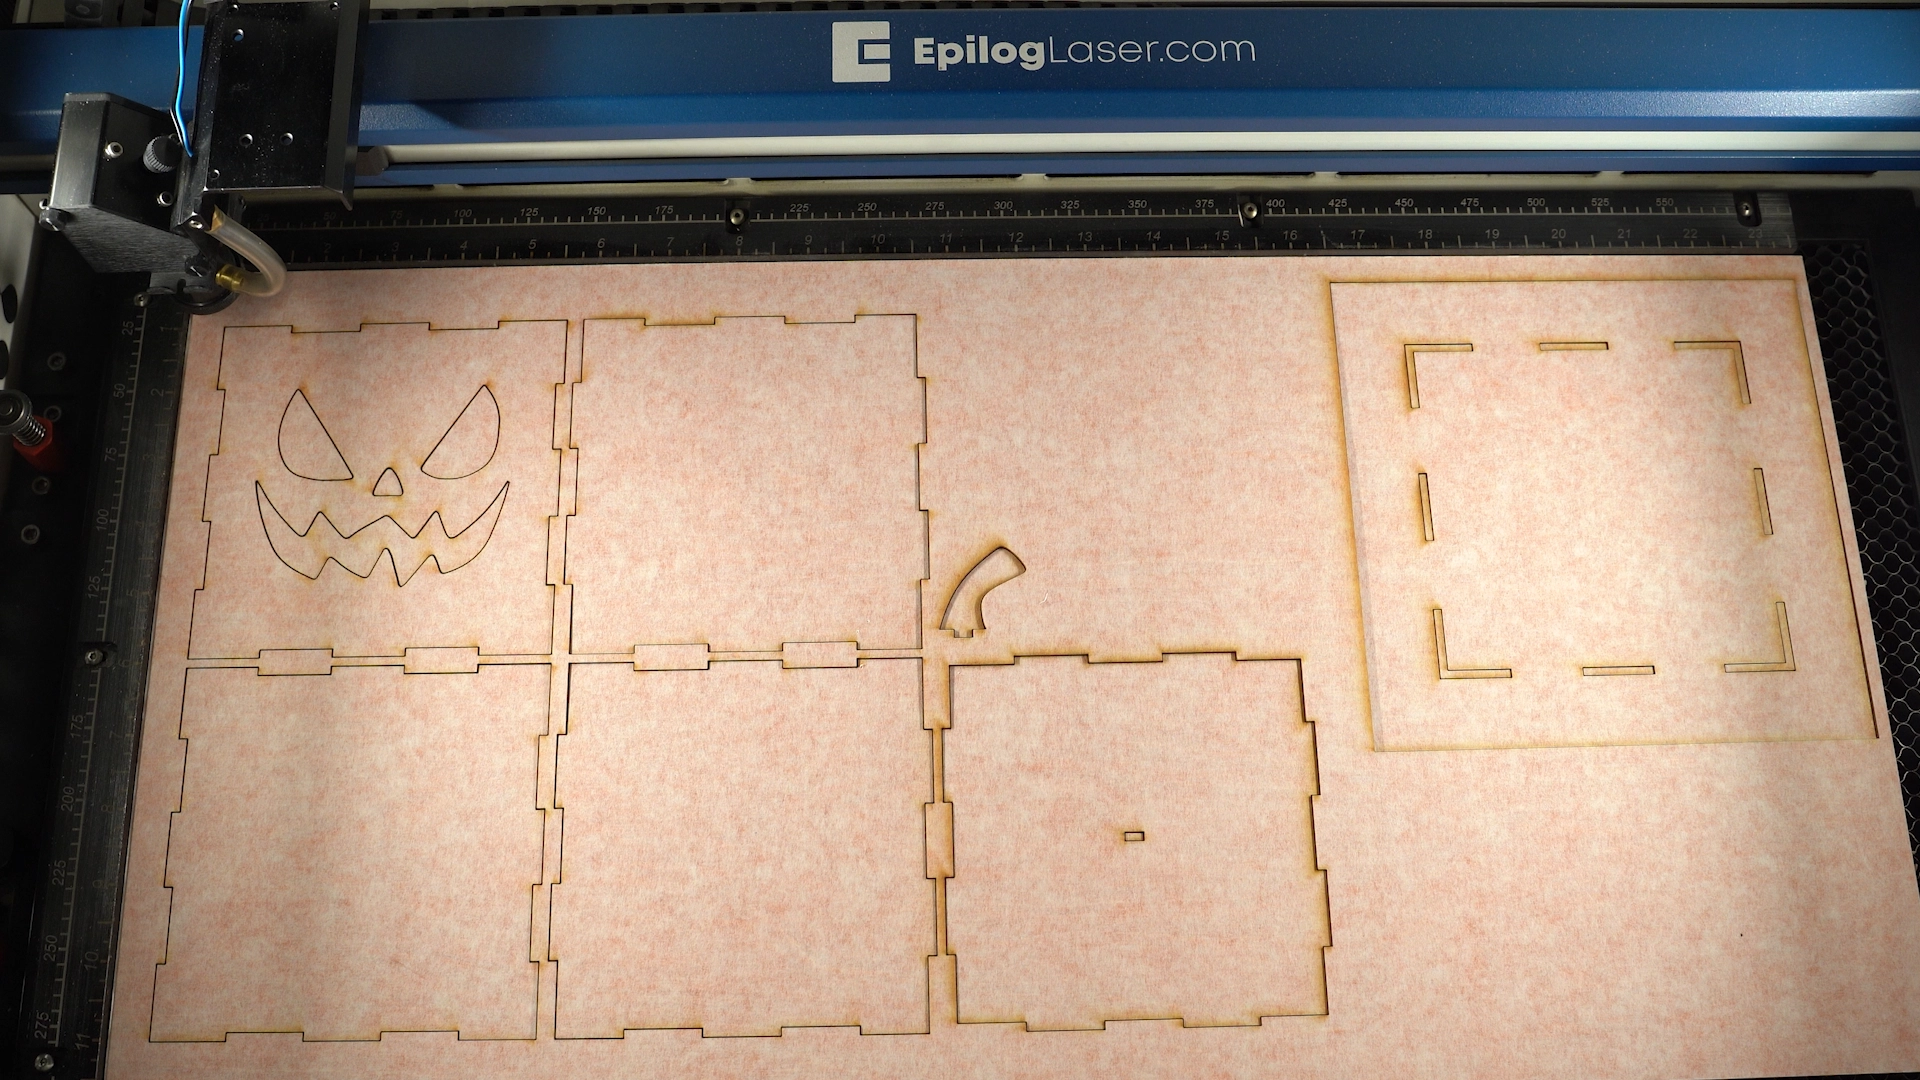
Step 8: Finalized Laser Cut Parts
Once the pieces and parts for the pumpkin lantern design are cut, remove them from the laser.
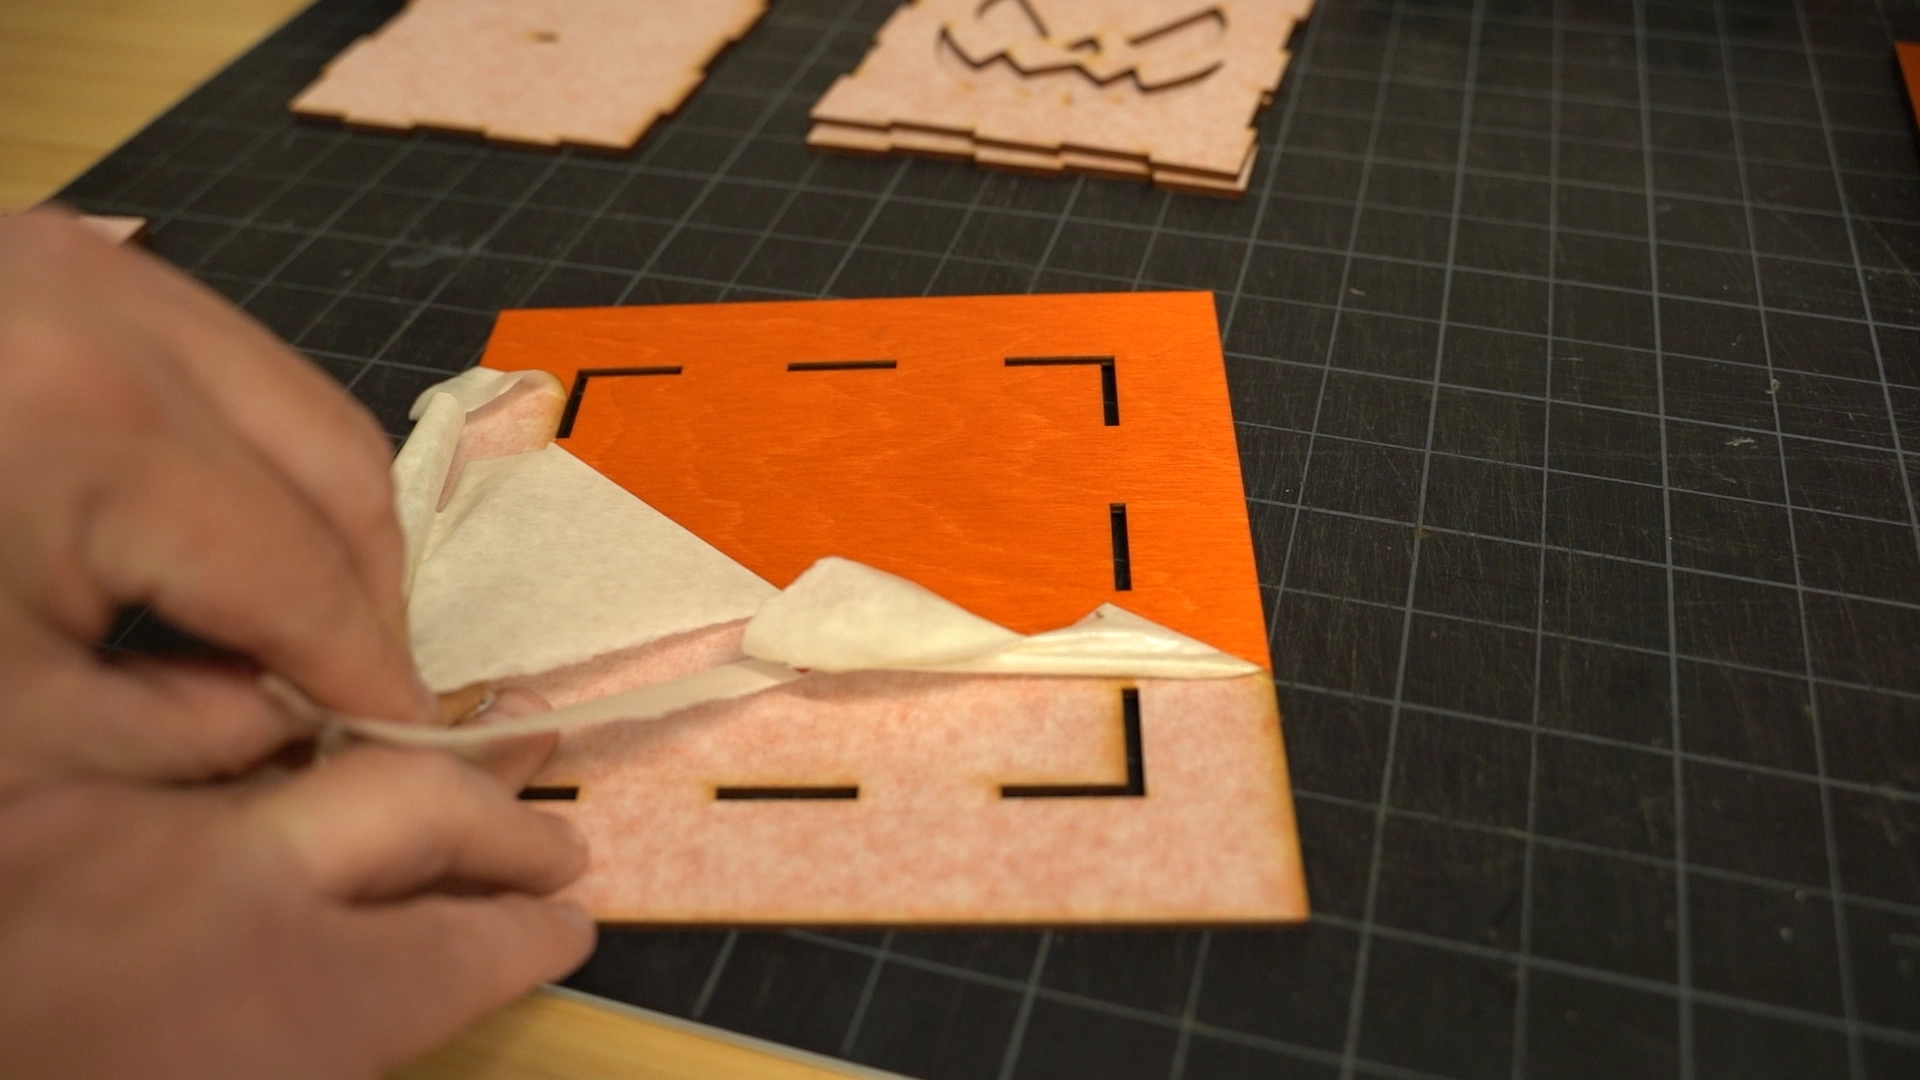
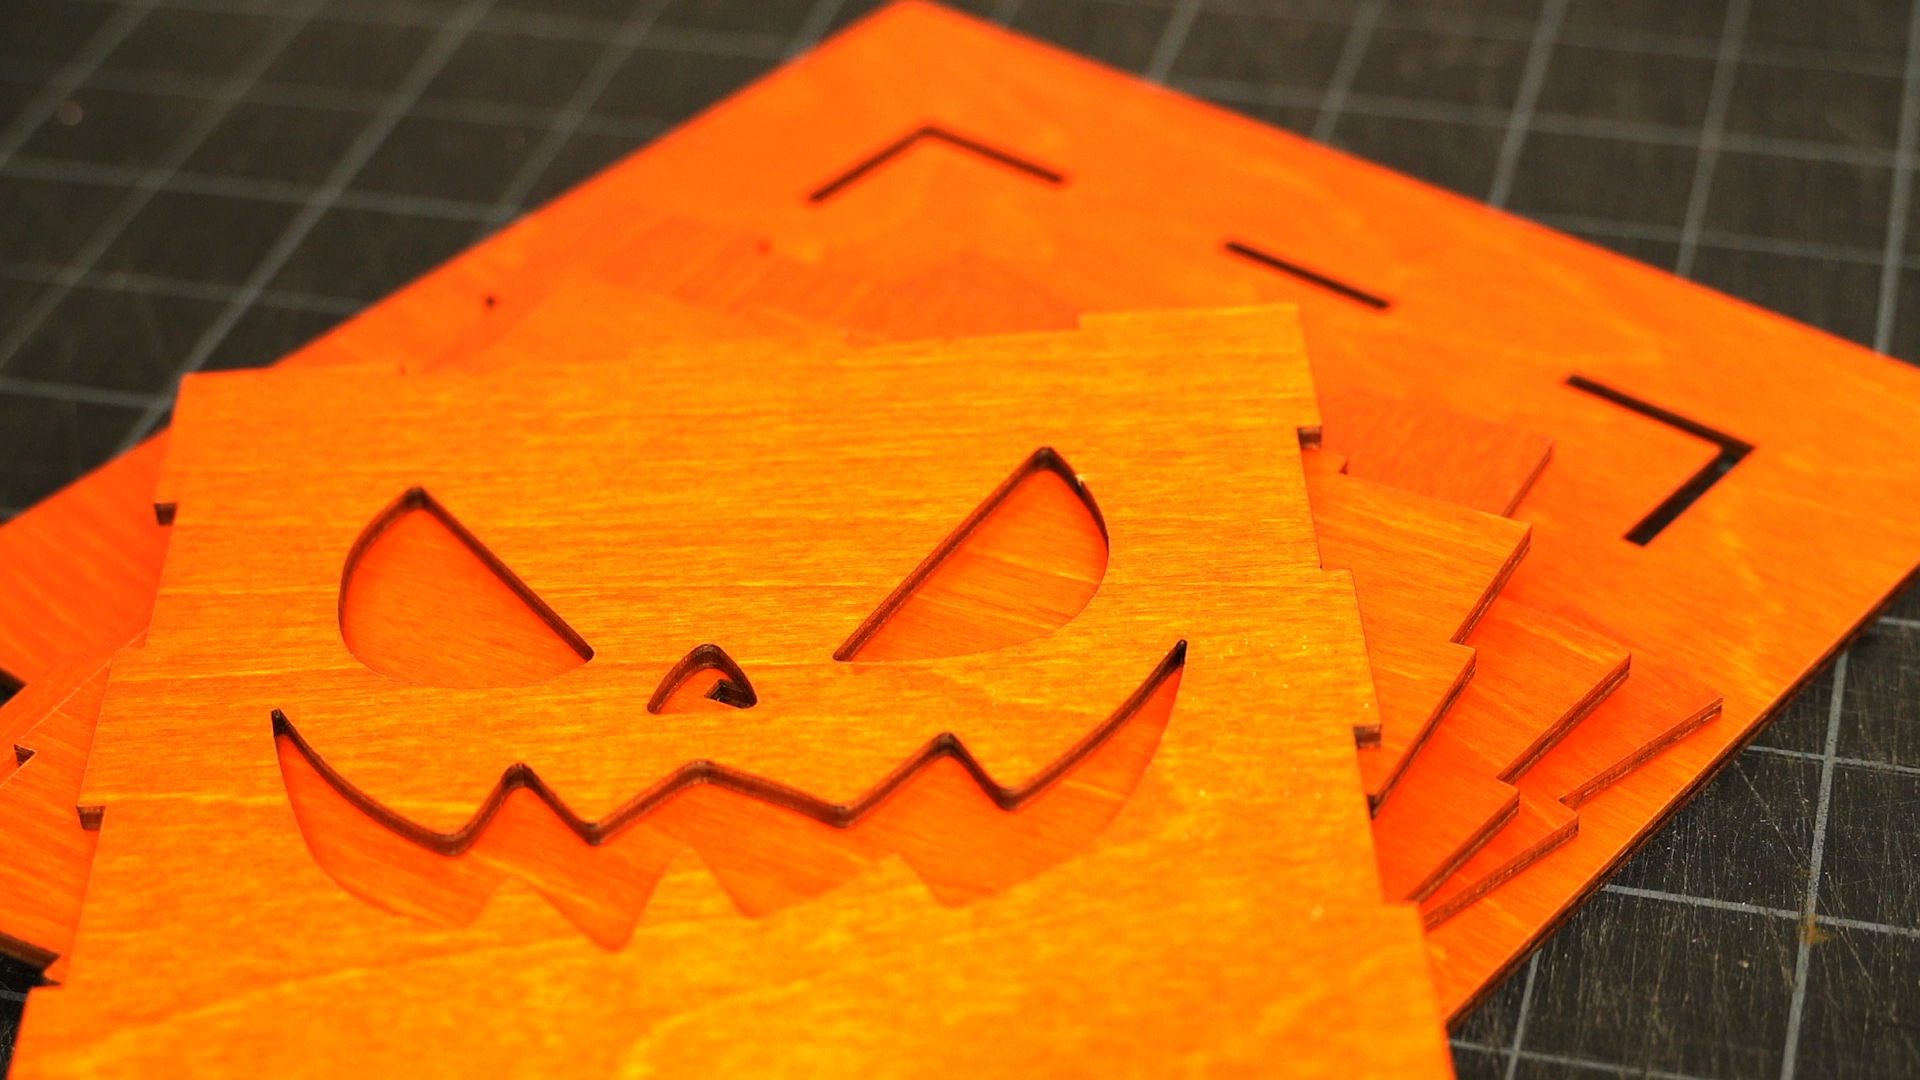
Step 9: Remove Protective Masking
Remove the masking material from the parts.
Step 10: Assemble the Pumpkin Lantern with Glue
Now assemble and glue the sides and top of the box together without gluing the base piece of the lantern together.
Note: You’ll need the bottom piece of the box unattached so you can add the puck light to the lantern later.
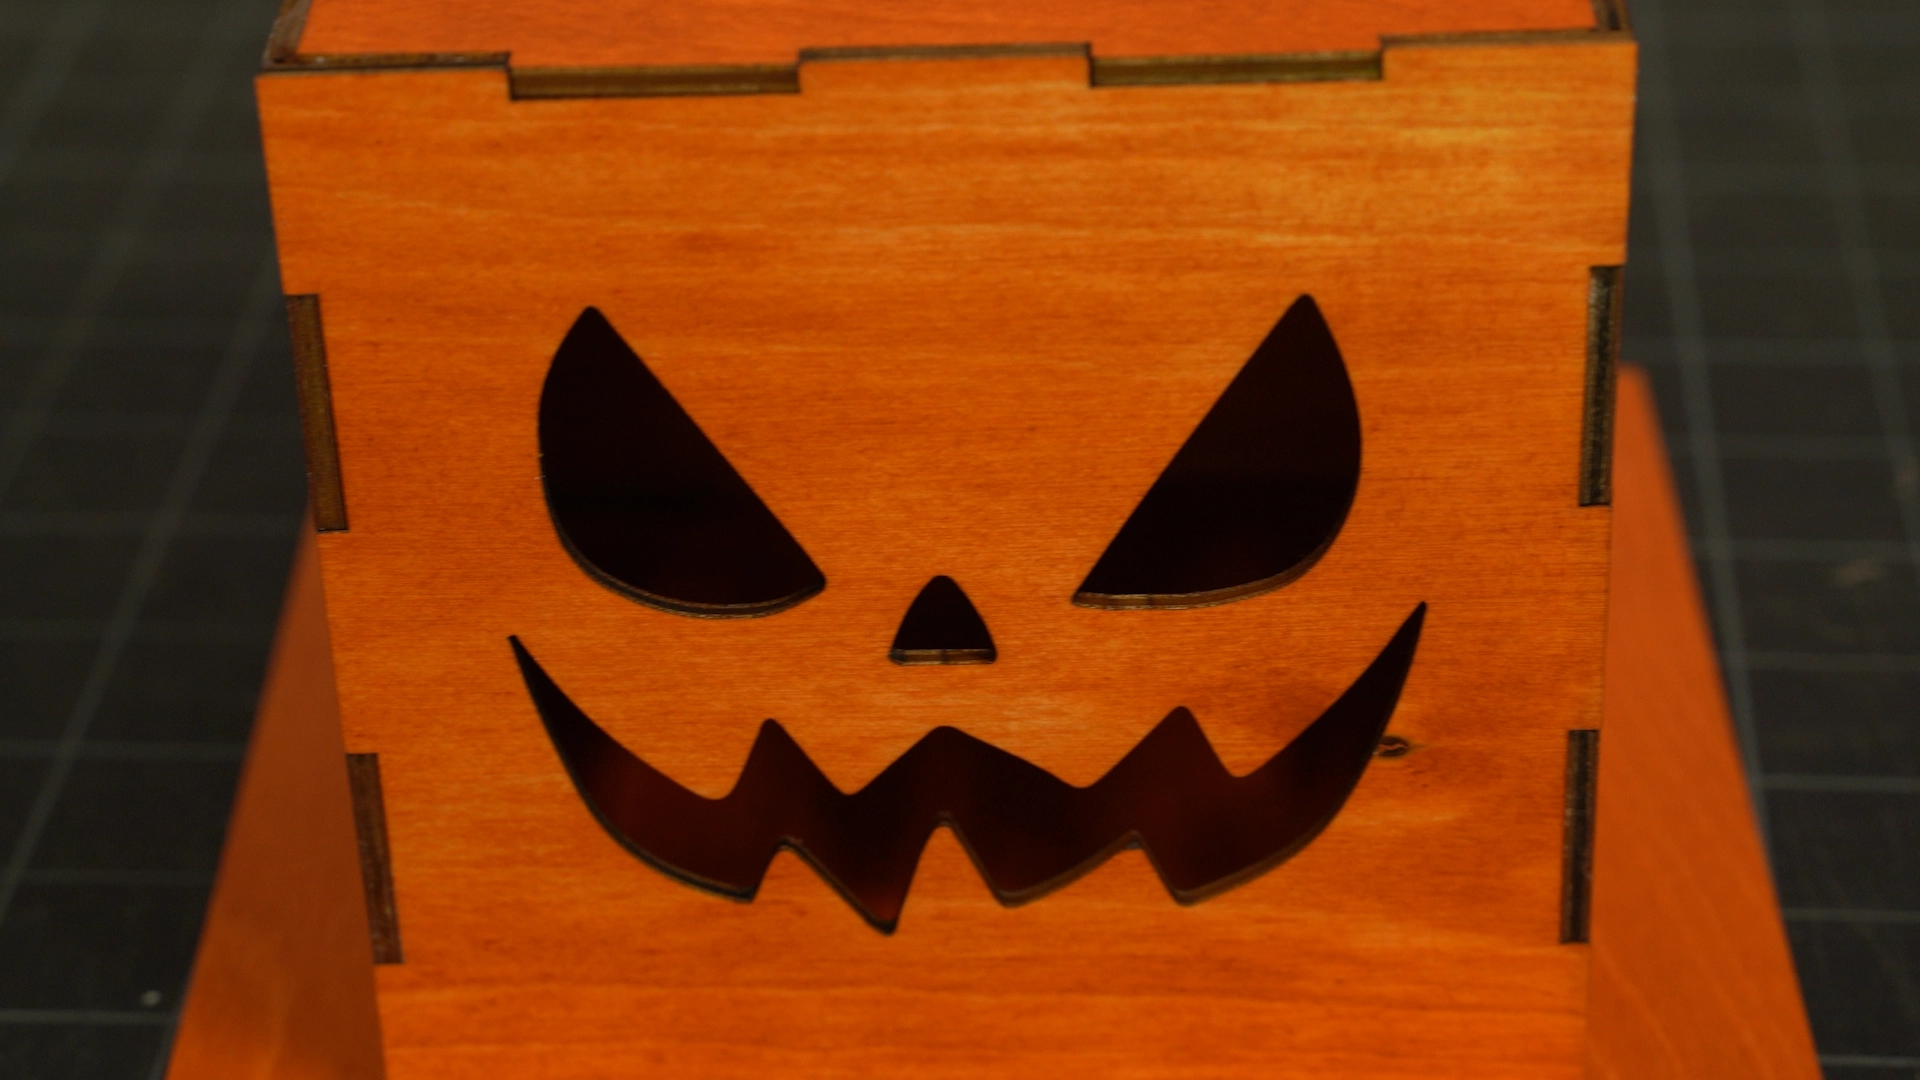
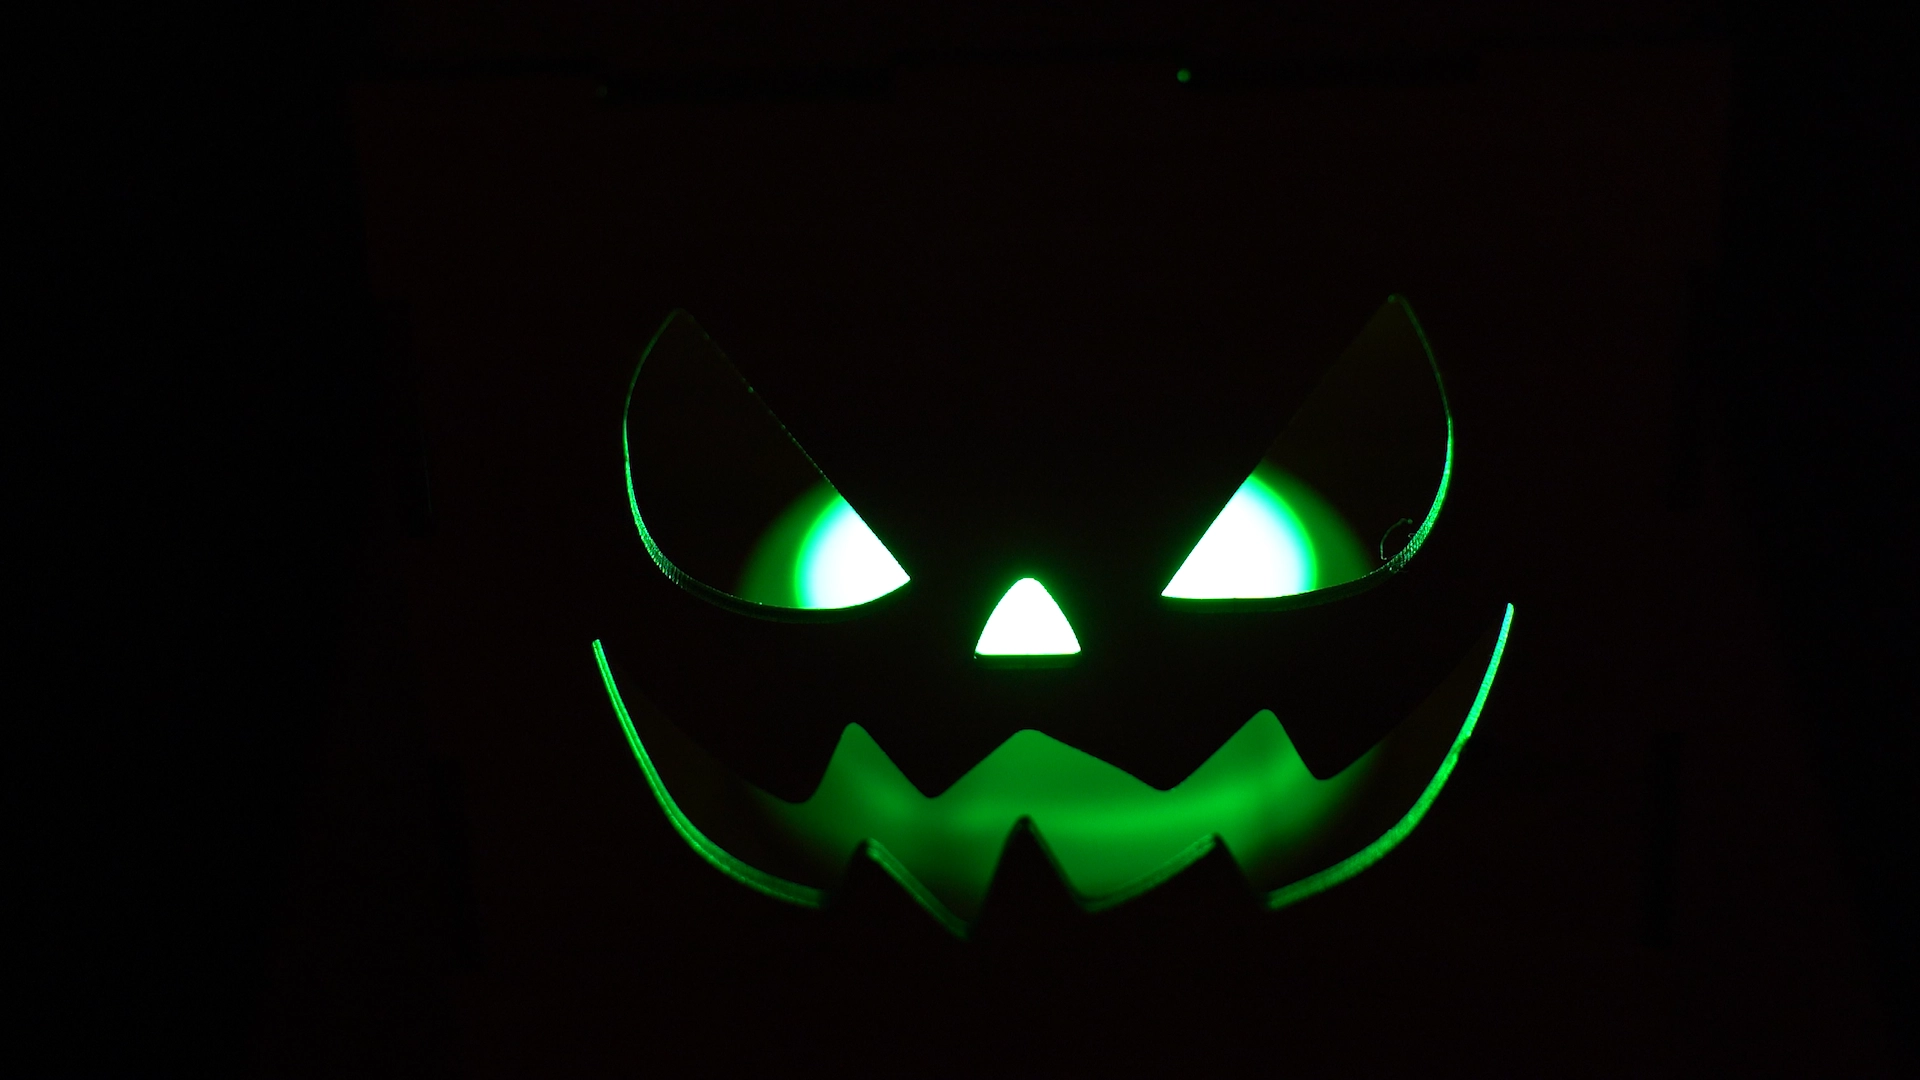
Step 11: Finished Pumpkin Lantern Laser Project
With the lantern now assembled, add a puck light and test its look in the dark. This fun and festive design will be a great décor addition to your home or party this Halloween season.