How does it work?
3 Simple Steps to Get Started
-
1
Connect your device
Design in your favorite software and connect to the laser via laptop or tablet
-
2
Pulse Interface
Fine tune your settings and assign speed and power by material
-
3
Start Engraving!
Send the job to the laser and press go!
Get Connected
Connect the laser to your device in one of three ways: Wi-Fi, Ethernet, or USB. Set-up instructions for all three can be found in our Setup Guide.
Once the user follows the appropriate instructions for their device, they open a web browser window, type in the IP address of the laser, and hit enter. The app loads automatically, and users can then import various files and send them to the laser for processing.
Setup GuideWi-Fi
Ethernet
USB
Easy to use Interface
Your favorite art files and devices, to your laser
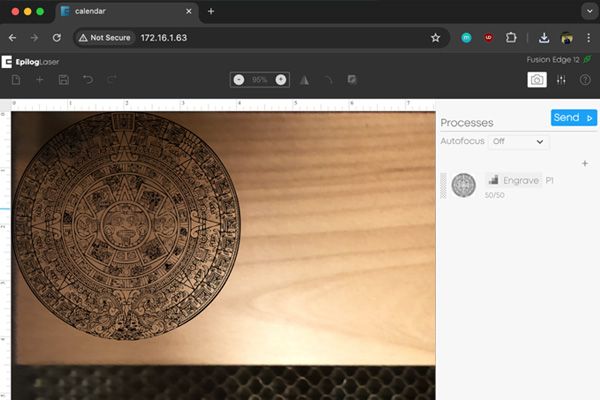
Utilize the Iris Camera
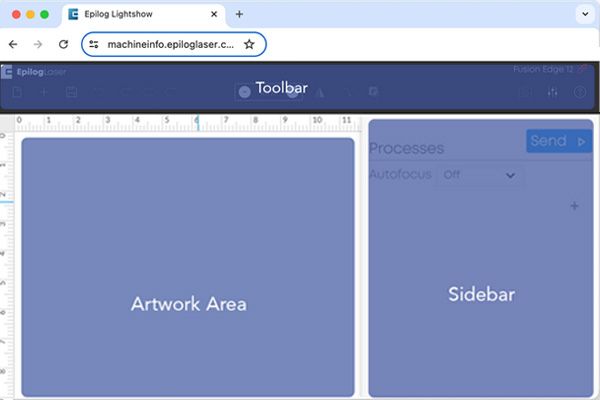
Editing the Interface
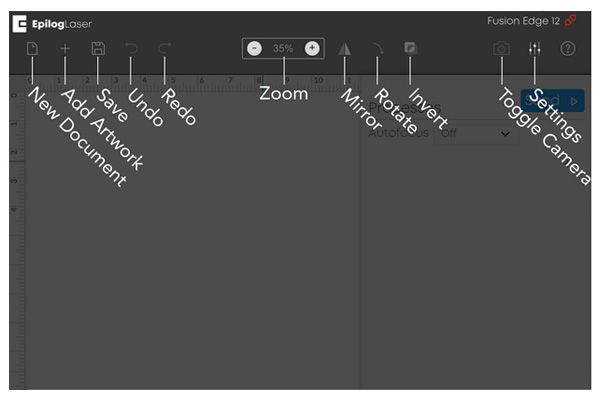
Interface Toolbar
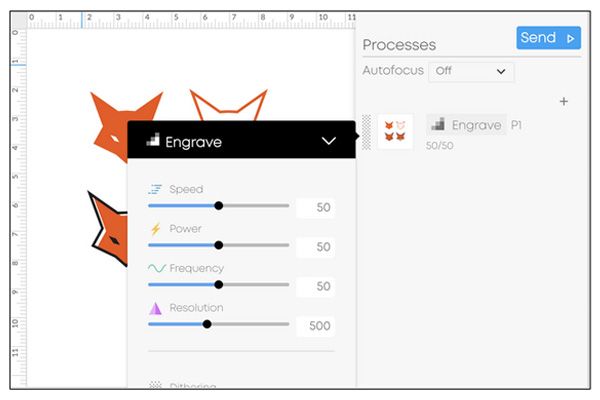
Editing Process Settings
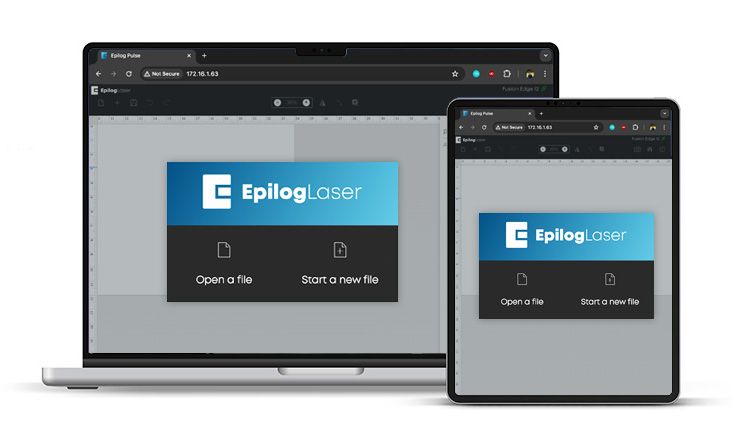
New Devices
Use your laptop or tablet,
now supporting Mac OS

“This revolutionary enhancement has been a long time coming. This new app is a game-changer in the laser processing space as it enables our users to send jobs to the laser from their Mac, PC, or tablet – any device where you can access a browser.”
Unlock your Creativity


FAQ’s
You’ve got questions, we got answers.
Currently supported file formats are: SVG, GIF, BMP, JPEG, PNG, and TIFF. Operators can use nearly any software, such as Adobe Illustrator or CorelDRAW that allows them to export files in those formats, and open them directly in Epilog Pulse.
Yes, this just the initial version. We plan on adding new and exciting features to enhance your laser processing experience.
Looking for inspiration?
Request Free Samples and Information
"*" indicates required fields
